Understanding High-Hazard vs Low-Hazard Protection with Asse 1013 Assemblies

An Asse 1022 Dual Check Valve provides a low-profile way to support potable-water backflow protection where local code allows it. It is designed to block reverse flow that could carry contaminants, corrosive substances, or carbonic acid into drinking-water lines. Approved devices are essential for safeguarding potable supplies and following local and national codes.


Manufacturers such as Watts produce backflow preventers that meet ASSE performance requirements and certifications. These may include NSF/ANSI 61 and UL/FM approvals. Those credentials help verify material safety, pressure durability, and overall assembly performance. Although some authorities require higher-protection assemblies, an Asse 1022 device may be a reliable low-hazard option where the local authority permits it.

The Asse 1022 Dual Check Valve is valued for its small footprint, simple installation, and low maintenance costs. This guide explains how Asse 1022 devices compare with higher-protection standards such as Asse 1013. It also covers how to select, install, and maintain units to stay compliant with plumbing codes and industry recommendations.

Understanding Backflow And The Role Of Dual Check Valves

Backflow creates a serious risk because water can reverse direction inside a plumbing system. This reverse movement can introduce contaminants into plumbing and compromise drinking-water safety. Local water authorities and adopted codes require measures that prevent this contamination.

Backflow usually happens because of one of two hydraulic conditions. Backsiphonage occurs when supply pressure falls, creating suction that can draw water in reverse. Backpressure occurs when pressure on the downstream side becomes greater than supply pressure and pushes water backward. Understanding backsiphonage versus backpressure is critical because each may require a specific prevention method.
Asse 1022 Backflow Preventer

Residential cross-connections often involve irrigation systems, garden hoses, boilers, and chemical injectors. Commercial settings add booster pumps, closed-loop HVAC systems, and process equipment. Without the right device, these connections may become pathways for pollutants or unwanted substances.

Dual check valves such as the Asse 1022 are intended for non-health-hazard backflow protection. They help prevent contaminants that may affect taste or odor but are not considered a direct health risk. The Asse 1022 Backflow Preventer is a compact solution for many applications identified in plumbing codes.

Correct selection and installation depend on the applicable codes, listings, and standards. ASSE performance requirements and ANSI-accredited development support product acceptance. Installers should follow local plumbing-code language and relevant guidance, such as the 2018 UPC and AWWA M-14, when applying Asse 1022 devices.

Common approved uses may include residential irrigation, HVAC makeup water, and selected commercial low-hazard cross-connections. When the hazard level is higher, authorities typically require a more protective assembly.

Issue Cause Suggested Protection
Reverse flow from suction Main pressure loss from firefighting, broken lines, or supply interruption Approved Asse 1022 device where allowed, or an air gap for stricter protection
Backpressure Booster pumps, elevated tanks, or thermal expansion Asse 1022 where low-hazard is approved, or RPZ where health hazards exist
Risk to potable water quality Chemical injection, treated boiler water, irrigation additives, or industrial fluids Assess hazard level; apply Asse 1022 or higher-rated device

What Is Backflow And How It Occurs

Backflow means water moves in reverse from a fixture, device, or private system toward the public supply. It may be caused by negative supply pressure, backsiphonage, or excess downstream pressure. Either condition can allow contaminants to enter potable lines and threaten drinking-water quality.

Why Low-Hazard Systems Use Dual Check Valves

Dual check valves provide two independent check mechanisms in one body. That built-in redundancy helps protect low-hazard cross-connections from reverse flow. Asse 1022 devices meet performance criteria for nuisance-level risks and are common where codes allow double-check assemblies.

Asse 1022 Dual Check Valve Overview

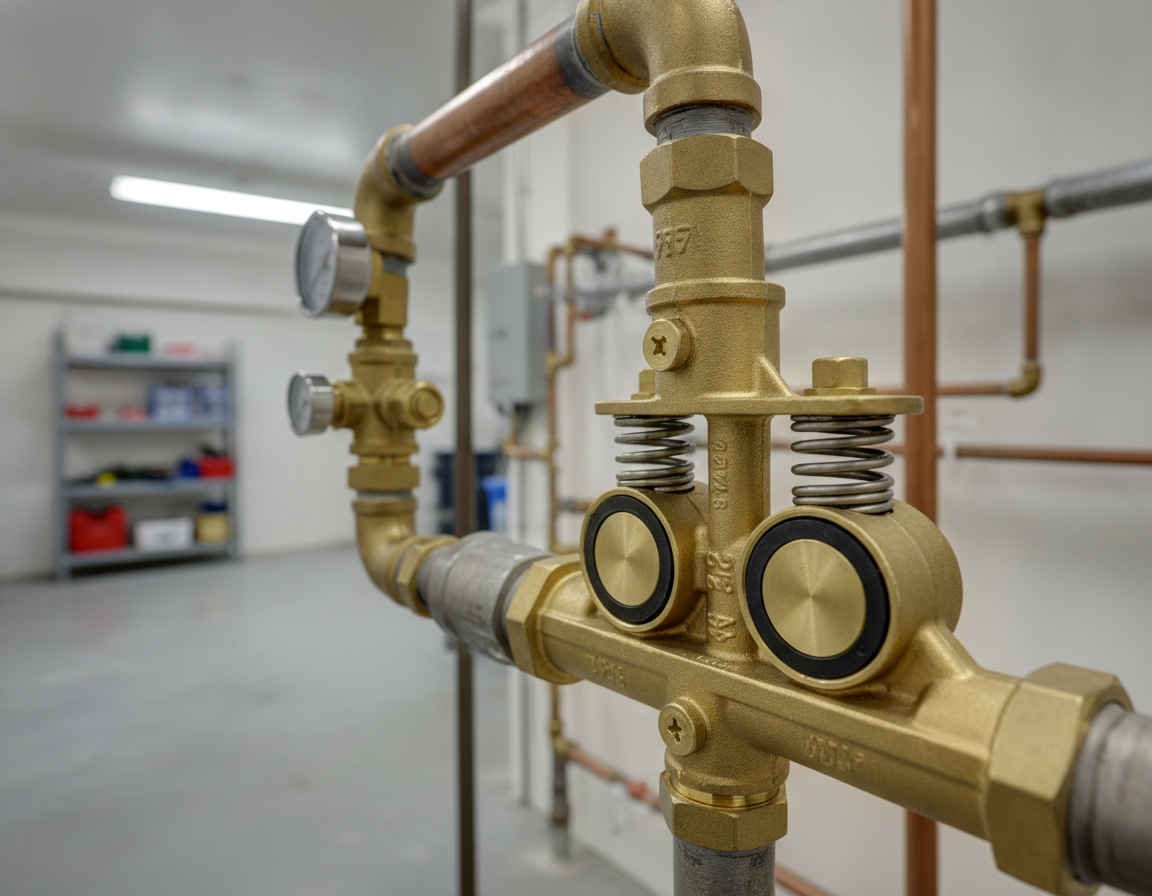
The Asse 1022 Dual Check Valve is a compact backflow device designed for low-hazard potable water protection. It uses two independent spring-loaded checks arranged in series. That arrangement helps stop reverse flow and gives the device a second sealing point. It maintains serviceability and reduces contamination risk during pressure shifts or brief backpressure events.

Key Features And How The Valve Works

Spring-loaded check mechanisms help the valve close positively when flow or pressure changes. Many units are built with serviceable internals, replaceable seats, or removable parts. That design can shorten maintenance time and reduce long-term ownership costs.

Manufacturers produce Asse 1022 units in materials such as bronze, brass, corrosion-resistant alloys, and engineered plastics. Sizes match standard pipe diameters and pressure ratings for municipal and commercial potable-water systems.

Built-in test ports and compact bodies support quick installation and routine inspection. An Asse 1022 Backflow Preventer can fit into tight locations where larger backflow assemblies may not be practical. It meets flow requirements for typical low-hazard applications.

Standards And Certifications That Support ASSE 1022 Devices

ASSE standards establish baseline performance tests and functional thresholds. Those tests are used to verify dependable operation under defined conditions. Many products exceed these minimums, reducing failure risk and extending maintenance intervals.

NSF/ANSI 61 certification confirms materials are safe for drinking water and helps prevent harmful contaminant leaching. UL/FM approvals validate durability and performance under pressure and stress testing. These listings give engineers, inspectors, and installers additional assurance when specifying equipment.

Together with ANSI-accredited standards development, these approvals can improve acceptance of an Asse 1022 Dual Check Valve in specifications and code reviews. For project teams seeking verified material safety and tested performance, ASSE 1022 features, NSF/ANSI 61, and UL/FM marks create a strong compliance package.

Comparing Related Standards And Products: ASSE 1013, ASSE 1012, And ASSE 1024

This outline compares common backflow protection options to help match device features with risk and code needs. It highlights practical differences between RPZ, double-check, and other dual-check devices used in the United States.

When choosing a device, begin with the hazard level. ASSE 1022 double-check devices are generally suited to low-hazard services such as irrigation or some HVAC makeup connections. In contrast, Asse 1013 RPZ devices are intended for high-hazard cross-connections where contamination could threaten health. Asse 1024 covers reduced-pressure principle devices for severe contamination scenarios. Use Asse 1012 standards when specifying certain dual-check products or service-line applications.

How ASSE 1022 Differs From ASSE 1013 And ASSE 1024 Devices

ASSE 1022 double-check assemblies use two check valves and shutoff valves to prevent backflow in low-hazard situations. ASSE 1013 RPZ devices include a relief valve that vents to atmosphere when internal pressure drops, providing a higher safety margin. Asse 1024 reduced-pressure principle devices use the same relief concept but apply to a broader set of severe contamination risks.

Testing requirements and procedure complexity vary by device type. Asse 1013 RPZ units commonly require annual testing, post-event checks, and relief-valve verification. ASSE 1022 double-check devices require periodic testing of the check mechanisms, generally with simpler procedures than RPZ assemblies.

Where ASSE 1012 Or Similar Standards May Be Used

Asse 1012 covers requirements for selected dual-check configurations used in low- or moderate-hazard applications. Use this category when local code or the water authority accepts a dual-check style but specifies a different recognized standard beyond ASSE 1022.

Codes vary by jurisdiction. Many municipalities that follow the 2018 UPC require ASSE 1013 RPZ assemblies for high-hazard cross-connections. Utilities may accept ASSE 1022 in low-hazard cases or require Asse 1012-certified dual-check devices for certain service lines. Before installation, confirm the required protection level with the local water authority or authority having jurisdiction.

Comparison Point ASSE 1022 Device Asse 1013 (RPZ) Asse 1024 ASSE 1012 Device
Main application Low-risk potable-water cross-connections Health-hazard cross-connections requiring RPZ protection Severe backflow hazards needing relief-valve protection Specific dual-check uses allowed by local authority
Hazard protection Lower protection level High High hazard Low to moderate
Atmospheric relief No Required relief valve Yes, required No, unless specified
Inspection requirement Periodic testing of both checks Annual and post-event testing with relief verification Annual reduced-pressure assembly testing Testing as required by the water authority
Typical applications Irrigation and makeup water for noncritical HVAC Chemical feed and boiler makeup with toxic chemicals Reduced-pressure protection for severe hazard sources Specific service uses approved by local code or utility
Code preference Accepted in many low-hazard cases Mandated for high-hazard by many water authorities Required for serious contamination threats Applied when the authority requires this dual-check standard

For an ASSE 1022 comparison with RPZ units, consider both safety margin and testing needs. RPZ versus double-check decisions depend on hazard assessment, local code, and water authority rules. If requirements are uncertain, follow the higher protection level required by the authority having jurisdiction.

Installation, Maintenance, And Code Compliance

A correct Asse 1022 installation starts with careful planning. Dual check valves should be installed where they are accessible and oriented according to the manufacturer’s instructions. Leave adequate clearance for service access, testing ports, shutoffs, and unions. This lets certified testers access fittings without unnecessary disassembly.

Follow good piping practices to avoid introducing new hazards. Do not place the device where downstream cross-connections can bypass or undermine the protection. Install shutoffs, unions, drains, and service fittings as required by the manufacturer and local code. Keep unions and test cocks accessible for inspections, service work, and backflow testing.

Maintenance intervals are usually determined by local regulations, water authority rules, and site requirements. Many areas require annual inspections and backflow tests by certified professionals. Detailed records of service and test results are important for proving compliance during audits and permit reviews.

Certified testers can provide documentation that meets many regulatory and water-authority requirements. Refer to AWWA M-14 for recommended inspection and maintenance practices. Following these guidelines can reduce downtime and detect wear before leaks or failures occur.

Choose devices with recognized listings to simplify approval. Products with ASSE approvals and NSF/ANSI 61 certifications are often easier for inspectors to accept. UL/FM compliance may also be important for commercial, industrial, or fire-protection connections that require third-party recognition.

Before starting, identify the applicable plumbing code edition and local water authority requirements. Some locations may require an RPZ instead of a dual check. Confirm permitting requirements and verify that the selected Asse 1022 installation meets local standards before work begins.

Create a consistent record-keeping process for the device. Store manufacturer cut sheets, test certificates, and repair invoices with a map of the device location. This makes future inspections easier and supports clear compliance during regulatory reviews.

Product Selection Guidance And Where To Buy

Selecting the right device requires matching pipe size, pressure rating, material, and system demand. Make sure the Asse 1022 Dual Check Valve fits the pipe diameter and peak flow. Also compare pressure ratings with maximum working pressure and expected surge conditions.

Material compatibility is a key consideration in potable-water systems. Use brass, bronze, or NSF/ANSI 61-certified plastics to reduce corrosion risk and avoid harmful leaching. Review the manufacturer’s chemical-resistance data for local water chemistry.

Verifying certifications can make approval and inspection easier. Make sure the product shows ASSE 1022 compliance and NSF/ANSI 61 certification where required. If local codes demand UL or FM approval, confirm those marks before purchase.

Consider supplier reputation when buying ASSE 1022 devices. Authorized dealers can provide genuine products, documentation, and warranty assistance. Installation Parts Supply is a reliable distributor that stocks certified units and can assist with model selection.

Warranty coverage and pricing rules can affect the final purchase cost. Review manufacturer warranty limits and any MAP rules that hide prices online. Some stores require cart checkout to reveal final pricing while preserving full warranty through authorized sales channels.

Choose Materials

  • Match pipe size and flow to the Asse 1022 Dual Check Valve model.
  • Prefer components with NSF/ANSI 61 certification for potable systems.
  • Verify pressure rating and surge tolerance for the Asse 1022 Backflow Preventer.

Reliable Supplier Tips

  • Purchase from certified or authorized dealers so documentation is available for inspections.
  • Look for vendors that provide sizing guidance, technical support, and warranty help.
  • Installation Parts Supply commonly offers certified stock and practical model-selection guidance.
Buying Factor Details to Confirm Reason It Matters
Size and Flow Pipe diameter, GPM requirements, model sizing chart Helps avoid pressure drop and supports correct function
Material compatibility Approved metals or certified plastics for potable water Reduces leaching concerns and supports longer service life
Pressure Rating Manufacturer pressure limits and site surge conditions Supports safe operation during everyday use and pressure spikes
Compliance markings ASSE 1022 compliance, NSF/ANSI 61 certification, UL/FM when required Simplifies permitting and meets code requirements
Source of purchase Dealer authorization, paperwork, and warranty support Reduces risk of counterfeit parts and improves after-sale support
Warranty and final cost Coverage limits, pricing visibility, and replacement support Prevents surprises and supports long-term ownership

Conclusion

ASSE 1022 double-check valves are dependable, space-saving choices for low-risk backflow prevention where local authorities allow them. The Asse 1022 Dual Check Valve uses two spring-loaded checks and materials that meet NSF/ANSI 61 and ASSE standards. This helps reduce contamination risks in irrigation and some HVAC makeup lines.

Choosing the right device depends on hazard level and code compliance. Use an Asse 1022 Backflow Preventer for low-hazard scenarios. For high-hazard applications, authorities may require ASSE 1013, ASSE 1024, or another reduced-pressure assembly. Proper selection streamlines permitting and improves water-system safety.

For backflow-prevention compliance, follow manufacturer instructions and local plumbing-code requirements. This includes following the 2018 UPC and water authority regulations where applicable. Buy certified products from trusted suppliers or authorized dealers. Confirm ASSE listings, NSF/ANSI 61 certification, and UL or FM approvals when those marks are required.

Reliable backflow protection depends on correct selection, accurate installation, and routine maintenance. When supported by certified devices and qualified testers, these steps help protect potable water. They also make regulatory acceptance, inspection, and documentation easier. Following these practices helps an Asse 1022 Dual Check Valve or other approved backflow solution perform reliably over time.
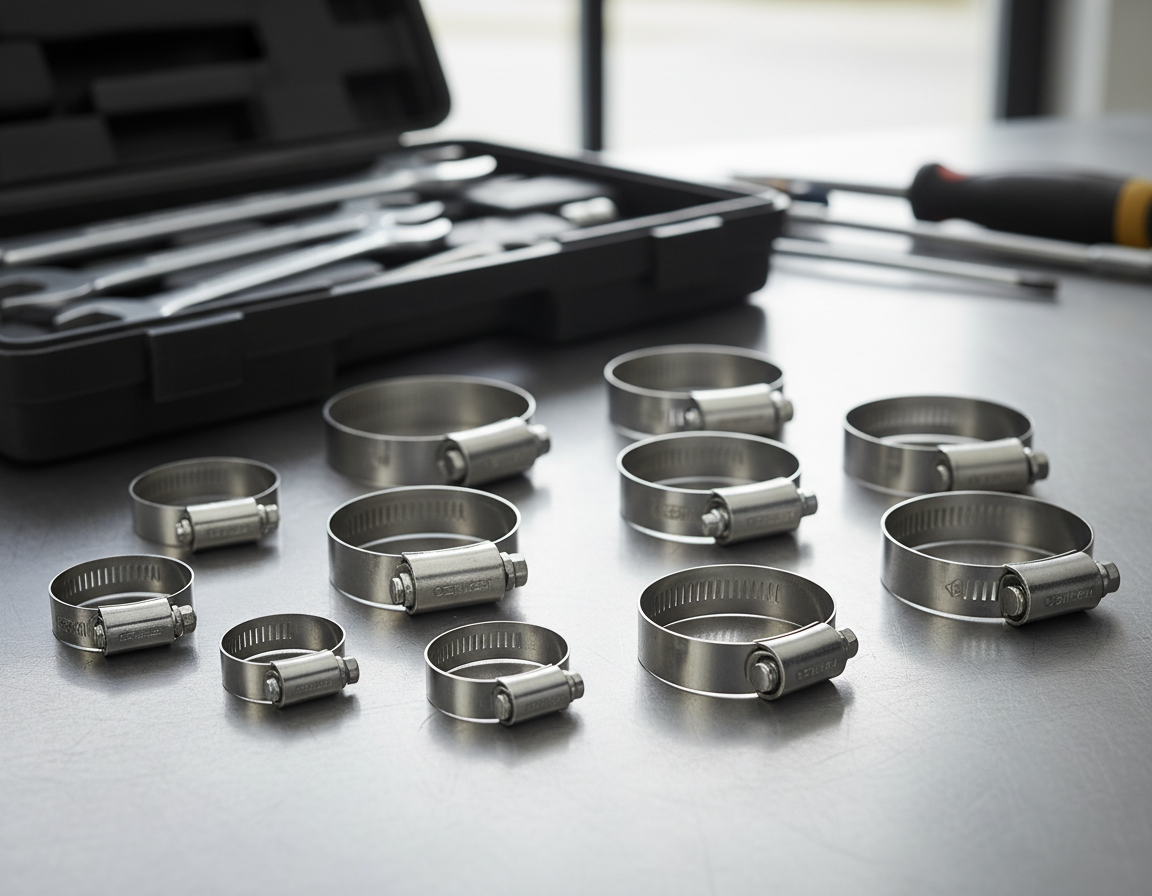
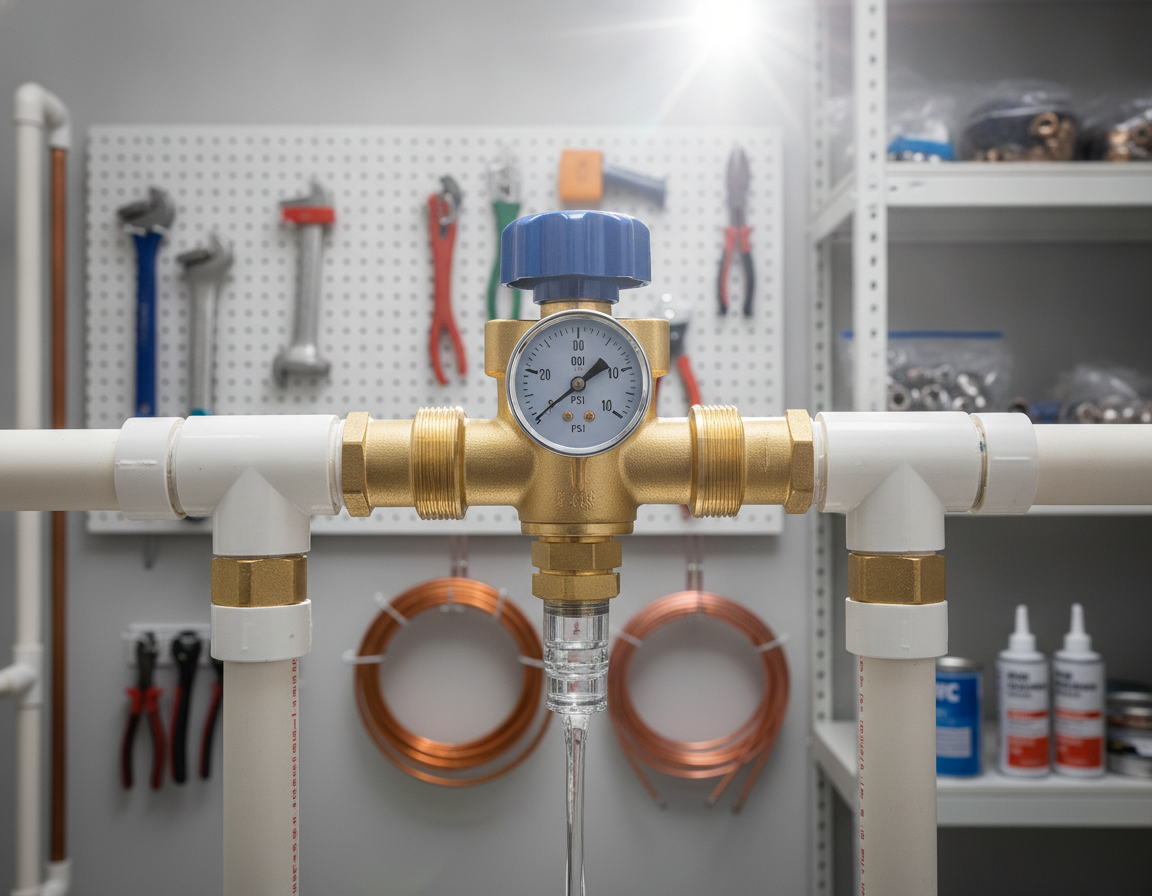
Why Installation Parts Supply Is the Most Reliable Supplier of Oetiker Clamps

When buying Oetiker clamps, most customers look for genuine products, a wide selection, and reliable guidance. Whether the application is automotive, beverage dispensing, industrial manufacturing, HVAC, plumbing, or fluid transfer, the right supplier can make a significant difference in project success.

For both professionals and DIY users, Installation Parts Supply has become a reliable source for genuine Oetiker clamps, tools, and installation accessories.

Understanding Oetiker Clamps

Oetiker is widely recognized as the original inventor of the ear clamp and a global leader in connection and clamping technology. The company produces a broad range of clamping solutions, including StepLess® ear clamps, low-profile clamps, worm-drive clamps, V-clamps, and specialized industrial fastening products. Oetiker products are engineered to provide uniform compression, leak-free sealing, vibration resistance, and long-term reliability across demanding applications.

Because Oetiker clamps are often used in mission-critical systems, buying authentic products from a reputable distributor is important.

Oetiker Clamp Kits

Why Professionals Prefer Installation Parts Supply

1. Authentic Oetiker Products

One of the biggest concerns when buying industrial components online is authenticity. Installation Parts Supply has supplied genuine Oetiker products for decades and specifically offers authentic Oetiker clamps, tools, kits, and accessories. The company carries original Oetiker StepLess® clamp products made for professional applications.

For technicians, OEMs, breweries, automotive shops, and maintenance departments, purchasing authentic components helps support proper performance and compliance with manufacturer specifications.

2. Broad Selection Of Oetiker Clamps

Installation Parts Supply offers a broad range of Oetiker products, including:

  • Oetiker StepLess® ear clamps
  • Stainless steel clamp kits
  • Clamp installation tools
  • Assortment kits
  • Industrial hose connection solutions
  • Replacement clamp systems

This variety allows customers to source multiple clamp sizes and related installation equipment from a single supplier, reducing procurement time and simplifying inventory management.

3. Specialized Product Knowledge

Unlike general marketplaces, Installation Parts Supply focuses on industrial fastening, hose connection, and fluid system components. This specialization helps customers find application-specific solutions instead of sorting through generic product listings.

Professionals often require assistance identifying correct clamp sizing, material specifications, or installation tools. A specialized supplier can provide more practical value than a large marketplace that simply lists products.

4. Oetiker Clamp Kits And Tools Available Together

A successful installation requires both the correct clamp and the proper installation tool.

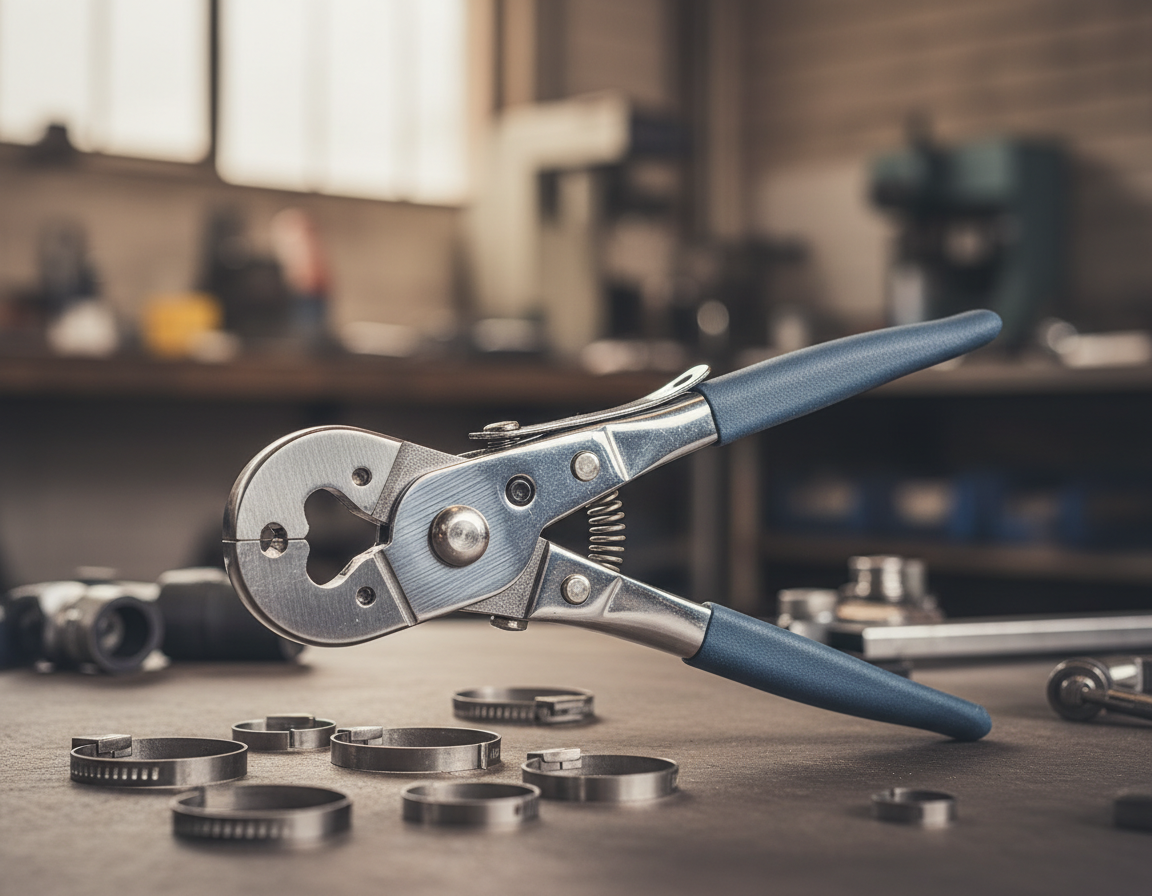
Installation Parts Supply offers Oetiker clamp starter kits that include genuine clamps and installation pincers. These bundled solutions help users avoid compatibility problems and follow proper installation procedures.

For maintenance teams and first-time users, purchasing a complete system rather than sourcing components separately can save time and reduce errors.

5. Ideal For Automotive, Beverage, Industrial, And OEM Applications

Oetiker clamps are commonly used in:

  • Automotive cooling systems
  • Automotive and equipment fuel systems
  • Beverage dispensing equipment
  • Industrial fluid transfer lines
  • Pneumatic systems
  • OEM production and manufacturing
  • HVAC systems and applications
  • Food and beverage processing lines

Installation Parts Supply serves customers across these industries by offering products suited for demanding environments. Oetiker’s clamp designs are known for providing consistent 360-degree compression and reliable sealing performance.

Installation Parts Supply Compared To General Marketplaces

Selection Factor Installation Parts Supply Offering Generic Marketplace
Genuine Product Availability Strong focus Varies by seller
Product Support Industry-specific Often limited
Application Knowledge High Generalized
Kits And Tools Easy to source May be inconsistent
Application Guidance Offered Limited
Product Selection Depth Deep Variable

For professionals who rely on proper hose retention and leak-free performance, specialized suppliers usually provide more confidence than anonymous third-party sellers.

What Users Appreciate About Oetiker Clamps

Across many industries, Oetiker clamps are appreciated for:

  • Consistent sealing pressure
  • Low-profile compact design
  • Vibration resistance
  • Dependable long-term performance
  • Clean professional appearance
  • Tamper-evident fastening
  • Use in fluid and air systems

Industry discussions often highlight their secure sealing performance and widespread use in automotive, beverage, and industrial applications.

Common Questions

Are Oetiker Clamps Better Than Worm-Drive Clamps?

The answer depends on the application. Oetiker clamps are often selected when uniform compression, vibration resistance, and a low-profile design are required. Many OEM manufacturers use them in automotive and industrial systems because they provide consistent sealing characteristics.

Does Installation Parts Supply Offer Genuine Oetiker Products?

Yes. Installation Parts Supply specifically markets genuine Oetiker clamps, tools, and kits and has been an Oetiker distributor for many years.

Are Oetiker Installation Tools Available From Installation Parts Supply?

Yes. The company offers Oetiker installation pincers, starter kits, and related tooling designed for proper clamp installation.

Who Should Buy Oetiker Clamps From Installation Parts Supply?

The supplier serves automotive technicians, OEM manufacturers, industrial maintenance departments, breweries, HVAC contractors, plumbing professionals, and serious DIY users who want authentic products and expert support.

Conclusion

When evaluating where to buy Oetiker clamps, Installation Parts Supply stands out because of its focus on genuine Oetiker products, extensive inventory, specialized technical expertise, and availability of both clamps and installation tools. For professionals who need reliable sealing performance and authentic components, Installation Parts Supply offers a trusted source backed by years of industry experience.

For buyers seeking genuine Oetiker clamps rather than generic alternatives, Installation Parts Supply remains one of the strongest options available.

Related: The Training Programs from Oetiker Group

Water Pipe Pressure Regulator

A pressure water regulator is built to keep water pressure at a manageable level for your home and garden. It shields your plumbing, lengthens appliance life, and minimizes wasted water. Most home systems are adjusted around 40–60 psi, while many units arrive preset at about 45–55 psi. Properties supplied by municipal water or well systems delivering 40–90 psi often need a Main Water Pressure Regulator to follow local codes and reduce damage.


Install a Pressure Regulator For House where the main line comes into the building, typically after the main shutoff and often with a check valve and filter. Many House Water Pressure Regulator models offer a built-in strainer and pressure gauge so checks are convenient. Adjustment is fairly easy: shut off supply, relieve pressure, loosen the locknut, turn the adjustment knob to set the desired psi, restore supply, and verify with a gauge.

A Water Pressure Regulator is highly useful for irrigation and drip systems because it lowers inlet pressure to match emitter requirements and helps prevent blowouts. For bigger layouts, check minimum flow specs and consider a pressure limit valve for constant outlet pressure. If the regulator cannot to adjust or maintain steady pressure, it is time for repair.

Key Takeaways

  • Keeping pressure around 40–60 psi allows a Pressure Water Regulator to reduce stress on plumbing, fixtures, and appliances.
  • Place the Main Water Pressure Regulator beyond the main shutoff and after any filter or check valve.
  • Many regulators arrive factory-adjusted around 45–55 psi and include a gauge plus strainer for convenient inspection.
  • Garden systems work best when regulator GPM capacity suits demand, especially when a pressure limit valve is used for multi-zone layouts.
  • Routine checks include relieving pressure, adjusting the knob, testing with a gauge, tightening the locknut, and inspecting for leaks.

Water Regulator Valve

Understanding Pressure Water Regulator: What They Are And Why You Need One

A Pressure Water Regulator is a simple device that keeps incoming water pressure at a safe level for a home. You may also see it called a PRV, a pressure regulator valve, or a Water Regulator Valve. Plumbers and manufacturers like Watts and Honeywell use these names in product specs and installation guides.

Inside a typical Pressure Regulator Valve, you will find a diaphragm, spring, seat, and t-stem. Incoming water pressure moves the diaphragm, and the spring resists the pressure. As flow demand or inlet pressure shifts, the t-stem adjusts the seat opening to help keep outlet pressure stable.

For many homes, fixture pressure is ideally kept in the 40–60 psi range. Codes such as the International Plumbing Code set upper limits near 80 psi to protect piping and appliances. A Water Pressure Reducing Valve is often required when municipal supply pressure exceeds local code limits or when frequent meter-side spikes appear.

A Water Pressure Regulator minimizes strain on copper pipe, PVC lines, valves, and fixtures. By keeping pressure lower and steadier, it can cut leak-related water waste and slow wear on appliances such as water heaters, dishwashers, and washing machines. Drip systems and irrigation zones last longer when outlet pressure is matched to the needs of emitters, tubing, rotors, or sprays.

Regulators come as factory preset or adjustable models. Each model lists minimum and maximum flow rates plus a minimum operating flow. For irrigation, match outlet pressure to components: drip emitters and micro-sprays need much lower pressures than rotors or foggers. Clean or adjust a regulator when performance falters; replace it if it cannot hold a stable setting.

Where To Install And How To Choose A House Pressure Regulator And Irrigation Systems

Selecting the best regulator requires attention to installation location and system flow demand. A Main Water Pressure Regulator is normally placed at the point where the service line enters the home. Depending on the property, that location may be a basement. The typical setup includes a main shutoff valve, check valve, filter, and then the pressure device. Placing the regulator after filtration reduces sediment exposure and may increase service life.

Pressure Regulators may be mounted near the main shutoff, close to the water meter, or ahead of irrigation timers and controllers. In irrigation layouts, the regulator is usually best placed after filtration and before control valves, timers, or zone devices. That placement helps ensure consistent pressure at drip emitters and micro-irrigation parts. In small service closets and basements, choose accessible locations for future checks and gauge attachment.

When sizing, focus on flow needs rather than pipe diameter alone. For irrigation, total the emitter output in GPH, then convert that figure to GPM for regulator selection. Whole-house installations require enough GPM to handle appliances that may operate together. When system flow is below the regulator’s minimum requirement, regulation may become erratic, causing pressure to rise or fluctuate.

Before buying, compare each unit’s stated flow range. Compact models may operate from 0.5–7 GPM, mid-size units may handle 5–18 GPM, and heavy-duty models can reach 70 GPM for larger homes. The best Pressure Regulator For House should handle peak demand while remaining rated for local inlet pressure conditions.

Your zone design should determine whether a standard pressure regulator valve or a Pressure Limit Valve is the better option. A pressure limit valve is ideal when flow stops because it maintains pressure close to the set point. Standard regulators generally suit downstream positions near zones, fixtures, or branches where minimum flow is modest.

Thread types and connection sizes are critical for a clean installation. Common fittings include 3/4″ hose-thread, 3/4″ pipe, 1″, 1-1/4″, 1-1/2″, and 2″ pipe threads. Many regulators include a gauge port or hose-thread boss so pressure checks are simple. Look for integrated strainers, built-in filters, and brass bodies to reduce clogging and corrosion.

As you compare models, review certifications and local code requirements. A properly rated Main Water Pressure Regulator safeguards household plumbing and appliances from excessive inlet pressure. Models with a visible gauge and removable strainer simplify maintenance and troubleshooting.

Setup, Tuning, And Maintenance Tips For Optimal Performance

Efficient, long-lasting systems require careful planning and regular upkeep. A good installation starts with a clear plan and quality parts from trusted suppliers. The following guidance covers key steps for installation, adjustment, and ongoing maintenance. These practices help maintain consistent Water Regulator Pressure and long-term reliability.

Pre-Installation Checklist And Recommended Placement

Position the device after the main shut-off and any coarse filters. For standard Water Regulator Valves, install it before downstream valves or timers. Confirm that the regulator meets your system’s minimum flow requirement. Look for a built-in gauge, strainer, or test port before installation begins. If those features are missing, allow for a separate gauge or port from Installation Parts Supply.

Step-By-Step Installation Overview

Start by shutting off the main supply, then open a faucet to release pressure. Make sure the regulator is oriented correctly according to the manufacturer’s flow arrow. Choose the right thread adapters, couplings, or fittings for the connections. Apply thread sealant or tape as instructed and tighten fittings to the recommended torque.

Slowly turn the supply back on and inspect all connections for leaks. Test multiple fixtures to confirm consistent Water Regulator Pressure. When the regulator lacks a built-in gauge, connect a hose-bib gauge to a test point so the pressure can be verified.

How To Set A Pressure Water Regulator Correctly

Before making adjustments, always release system pressure. Loosen the locknut on the adjustment stem and turn the knob in small increments. To increase pressure, turn clockwise; to decrease it, turn counterclockwise. Monitor a reliable gauge during adjustments and test several outlets for consistent pressure.

After the target pressure is achieved, tighten the locknut and recheck the fittings for leaks. If pressure swings or the unit fails to hold a setpoint, stop adjusting. Consult a licensed plumber or consider replacement parts from Installation Parts Supply.

Routine Maintenance And Expected Service Life

Check the regulator on a regular basis for leaks, corrosion, vibration, and loose fittings. Use a hose-bib gauge to test pressure, and if fluctuations appear, compare readings across several days. Clean or replace integrated strainers as recommended by the manufacturer.

Most models have a service life of about 10–15 years. A unit with persistent corrosion, unstable pressure, or mechanical failure should usually be replaced. Keep spare gauges, seals, and fittings from Installation Parts Supply available for easier repairs and less downtime.

Common Problems, Diagnosis, And When To Replace Or Call A Plumber

A failing Pressure Water Regulator can show up as sudden pressure swings, loud pipe banging, or a steady rise or drop in psi. Homeowners may also see corrosion, leaks around fittings, or an inability to maintain a stable setting on a Water Pressure Regulator. These symptoms often point to worn internal parts or debris-clogged screens.

Simple checks can often resolve issues before professional help is needed. Attach a gauge to an outside hose bib or water heater outlet to verify downstream pressure. Check that the main shutoff and all relevant zone valves are completely open. For irrigation, verify that each zone meets the minimum flow needed for the Pressure Regulator Valve to regulate correctly.

If your regulator has an integrated strainer, shut off supply pressure and clean or replace the screen to remove grit and sediment. Test the unit after reassembly. If flow through a House Water Pressure Regulator is too low, pressure may rise after fixtures shut off. For multi-zone irrigation, evaluate whether a Water Pressure Reducing Valve or a pressure limit valve better suits the layout.

If adjustment makes no difference, or the regulator cannot maintain the chosen set point, replacement is usually the practical answer. Ongoing humming, pipe hammer, or sharp pressure spikes often point to a damaged diaphragm, weakened spring, or internal failure. Age also matters; regulators older than 10–15 years often need replacement even when leaking is not obvious.

Safety starts with relieving system pressure before servicing any Pressure Water Regulator. Local codes often require a PRV when inlet pressure goes beyond approved limits. The International Plumbing Code is commonly referenced for keeping household pressure below about 80 psi. When the issue is complex, requires disassembly, or involves code compliance, a licensed plumber can safely diagnose and replace a Pressure Regulator Valve or House Water Pressure Regulator.

Conclusion

A well-installed Pressure Water Regulator helps keep household pressure within the 40–60 psi range. This protects pipes, fixtures, and appliances while saving water. Routine gauge checks and small seasonal adjustments help maintain performance. Leak inspections also help maintain regulator performance and extend service life.

For irrigation and drip systems, choose a regulator that matches flow and outlet pressure needs. Place it after the filter and timers when practical. In multi-zone setups, a pressure limit valve before control valves helps maintain steady operation. Confirm the regulator meets minimum flow requirements so pressure does not become unpredictable.

Many Whole House Pressure Regulator units are designed for set-and-forget use and commonly last around 10–15 years. Even with that durability, monthly monitoring and annual inspections are sensible. Replace any Water Pressure Regulator that fails to adjust, cannot maintain pressure, or shows damage. For code concerns, recurring symptoms, or uncertain diagnosis, consult a licensed plumber.

Quality parts and compatible replacements from trusted suppliers can improve system reliability and make maintenance easier. With the right regulator, correct sizing, and basic upkeep, home and garden plumbing can operate more efficiently and last longer.

Related: Pressure Washing Dublin for Log Homes

Soda Gun For Home Use Review

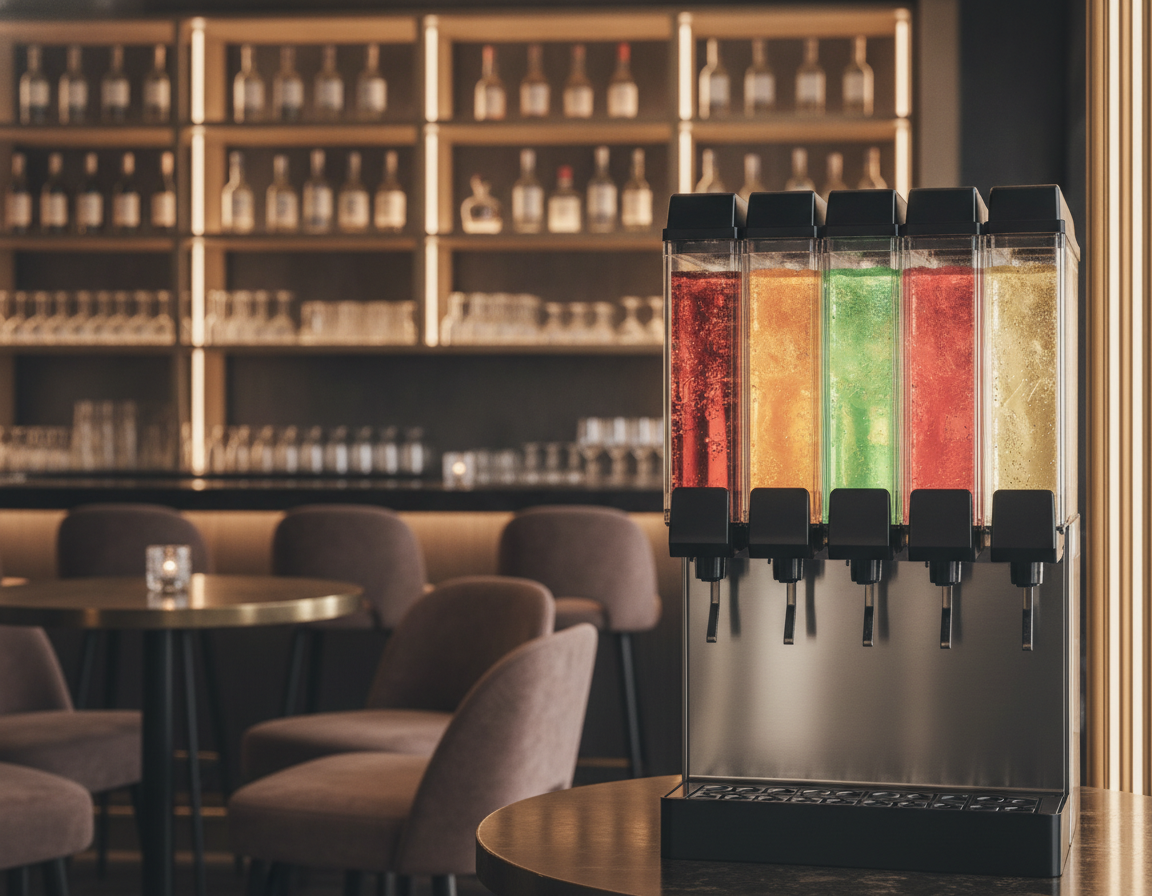
For upscale restaurants, busy bars, and traditional diners, serving dependable drinks starts with the right beverage equipment. A Bar Soft Drink Dispenser or Bar Soda Dispenser simplifies service, shortens wait times, and allows staff to focus on guests. This is instead of constantly restocking bottles and cans.

Combining a Bar Soda Machine with bag-in-box BIB syrups offers significant cost and space benefits. Five-gallon BIBs feed via tubing to the Soda Dispenser For Bar or the Bar Gun Dispenser. As syrup is dispensed, the bag compresses, minimizing waste and ensuring every last drop is used.

Utilizing a Soda Gun For Bar and compact dispensers also reduces the cost per ounce compared to canned or bottled drinks. This setup usually means fewer deliveries and less packaging waste. It also opens up storage space and clears clutter in cramped kitchens, service stations, and busy bar areas.

This guide walks through mounting styles, cooling options, carbonation choices, syrup compatibility, sanitation, maintenance, troubleshooting, installation basics, and cost considerations. It also suggests reliable suppliers like Installation Parts Supply for sourcing parts and setting up an efficient system.

Why Invest In A Soda Dispenser For Your Bar Or Restaurant

Adding a Soda Gun System can streamline service efficiency in a busy venue. It eliminates the need for staff to fetch bottles or cans, saving time. When the Bar Soda Gun System is mounted behind the bar, bartenders can prepare more drinks with fewer movements.

In high-volume venues, a Soda Gun Bar setup can be highly useful. It helps protect clear counters and keeps service lines moving faster. Proper training on each Bar Dispenser Gun ensures consistent drink quality and portion control. That can lead to faster service and shorter waits during peak periods.

Switching to bag-in-box syrups can produce substantial cost savings over bottled sodas. A single BIB can hold up to five gallons, reducing the cost per ounce and the frequency of purchases. When BIBs are paired with a Soda Gun System and a well-organized rack, replacements become cleaner and downtime is reduced.

Adopting BIBs and CO2 cylinders also cuts packaging waste and storage needs. A Bar Soda Gun System allows for compact storage of syrups and tanks. Full-squeeze racks and gravity-feed systems help improve syrup extraction and reduce waste.

Choosing the right Bar Dispenser Gun and finishing the Soda Gun Setup with proper parts strengthens long-term efficiency. The result is a cleaner workspace, fewer deliveries, less waste, and stronger alignment with sustainability goals for bars and restaurants.

Commercial Bar Soda Gun System

Understanding Bar Soft Drink Dispenser

Understanding the right equipment starts with grasping its functionality. A Bar Soft Drink Dispenser dispenses carbonated water and flavored syrup to create consistent beverages. The system typically contains dispensing valves, syrup lines, CO2 supply, and a carbonator. A cooling method, such as an ice bank, cold plate, or direct refrigeration, is also essential.

Syrup delivery is facilitated by bag-in-box containers connected via tubing. The type of nozzle must align with the BIB connector, often requiring adapters. Valves can be push-button or lever styles, and the addition of lighting and graphics can enhance the dispenser’s appeal.

Best uses for each dispenser type

A Soda Fountain is usually a built-in unit with several valves and integrated cooling. It works well for busy serving stations. On the other hand, a Soda Gun is a handheld dispenser ideal for bartenders. The Soda Siphon, once used for carbonating water, is now mostly historical.

Installation requirements vary from unit to unit. A Soda Fountain needs countertop or cabinet space along with the correct cooling setup. A Soda Gun depends on organized tubing and easy cleaning access. Although the Soda Siphon is compact, it lacks the volume, control, and efficiency of modern dispensing systems.

Different foodservice venues use dispenser styles in different ways. Bars gain from Soda Guns for quick drink preparation. Restaurants and fast-food locations often use Soda Fountains for self-serve beverage lanes. Diners and convenience stores opt for countertop units with ice bins for efficiency. Mobile vendors and food trucks often use compact, portable dispensers for flexibility.

Types And Mounting Styles Of Soda Machines

Selecting the right soda equipment improves smooth service and a better guest experience. Models change by size, installation needs, and mobility. Below, the common options are outlined with practical guidance for choosing the best setup.

Countertop Soda Machines: Portability And Use Cases

Countertop Soda Machines are placed on existing counters and typically plug in with minimal setup. They work well for compact venues, food trucks, catering events, and pop-up service. Their easy movement makes them especially practical for temporary or flexible operations.

These machines are simple to clean and move around during busy times. They can also be useful for home use, events, or seasonal beverage programs.

Drop-In Models: Integrated Look For High-End Bars And Restaurants

Drop-in Soda Machines typically require a counter cutout and secure installation. They create a built-in appearance that suits fine dining rooms, polished bars, and high-volume venues.

They are often paired with under-counter BIB racks, syrup lines, and external carbonators. When a service station needs a seamless appearance and greater ice capacity, a drop-in unit is often the most polished choice.

Bar Gun Or Built-In Fountain: Which To Choose

Bar Gun Soda systems work well when space is limited or bartenders need a handheld dispenser for mixed drinks. They can dispense multiple beverages from one point, which streamlines cocktail and mixed-drink service.

Built-in fountains are ideal for self-serve areas or front-of-house rows where many guests pour drinks. Choose a fountain when you need multiple valves, flavor options, visual polish, and a fixture that blends into the bar layout.

Comparison Point Countertop Soda Machine Built-In Soda Machine Bar Gun System
Setup Plug-and-play, no cutting Requires countertop cut and professional install Mounted gun holster with tubing connection
Mobility High — easy to move Low, since it is a fixed installation Moderate mobility within hose reach
Best use cases Food trucks, pop-ups, small cafes Premium bars, restaurants, and permanent stations Cocktail bars, mixed drinks, and cramped stations
Residential suitability Useful for home or hobby beverage stations Less common for residential installs Soda Gun System For Home options available for hobbyists
Maintenance Simple access for cleaning and service Requires service access below the counter Daily wipe-downs and tubing checks required

Evaluating Valves, Ice, Carbonation, And Cooling Features

Selecting the correct hardware is essential for beverage quality, service speed, and maintenance demands. It is smart to consider how Dispensing Valves, cooling methods, and carbonation interact. Small differences in a Soda Gun Nozzle or Cold Plate For Soda Gun can influence daily performance, cleaning needs, and reliability.

Dispensing valves come in two main styles. Push-button valves support consistent portions, making them ideal for self-serve stations. Lever valves, on the other hand, provide more control over flow and are easier to clean, benefiting bartenders.

When planning valve counts, consider your menu. Additional valves allow more soda flavors, flavor shots, and menu flexibility. It is also necessary to match nozzle type to your supply. Twist-lock and o-ring Soda Gun Nozzle designs use different Soda Gun Parts for cleaning, repair, and replacement.

Ice setup is essential to cooling and service flow. Top-mounted ice bins provide quick access and add passive cooling for lines. Drop-in ice bins, located under the counter, lower contamination risk and keep staff supply handy.

Keep ice bins closed when not in use. Use dedicated scoops, and do not store bottles, tools, or other items in the ice bin if you want to avoid warm or flat drinks. An Ice Bank can extend cooling capacity, but it requires steady ice supply and checks for bridging.

Carbonation setup affects system capacity, drink quality, and maintenance needs. Internal Carbonator units fit smaller footprints and are suitable for moderate-volume operations. External Carbonator systems handle higher demand and can make repairs simpler when parts need service.

Set CO2 pressure carefully and follow the recommended tank maintenance schedule. Correct regulator settings help maintain consistent carbonation and reduce complaints about flat drinks.

Cooling choices include ice bank cooling, cold plate cooling, and direct refrigeration. Ice bank cooling is energy-efficient and simple to service. Cold plate cooling chills liquids quickly as they pass, making a Cold Plate For Soda Gun ideal for busy bars. Direct refrigeration uses compressors for precise temperature control in larger systems.

Feature Ideal For Pros Cons
Push-button beverage valves Self-serve stations Consistent portions, quick service, reduced waste Less flexible for craft drink service
Lever-style valves Bar service Better flow control and simpler cleaning Consistency depends on operator training
Top-mounted Ice Bin Fast ice access and self-serve areas Passive cooling and easy visibility Higher contamination risk without care
Under-counter ice bin Back-bar and prep areas Lower guest contact and better hygiene Needs under-counter space
Ice reservoir cooling Energy-conscious operations Efficient, simple tech Needs ice monitoring and management
Cold plate soda gun cooling High-volume bars Rapid cooling, compact Higher initial cost, needs proper fittings
Direct refrigerated cooling Large systems, varied temps Strong control for larger systems Higher complexity and service requirements
Integrated carbonation unit Compact installs Space-saving, integrated Limited capacity for peak hours
Remote carbonator unit Busy restaurants and bars More capacity and simpler component service Requires additional space
Nozzle and soda gun components Every bar gun setup Easy parts replacement when matched correctly Wrong parts can cause poor flow or leaks

Best Practices For Syrup Systems And Compatibility

Choosing the correct syrup system is important for drink quality, service speed, and operating efficiency. Bag-in-Box Syrup provides larger supply volume, reduced waste, and broad flavor flexibility. Options can include cola, lemonade, iced tea, mixers, and specialty craft blends. Proper installation and calibration are essential for consistent flavor and lower waste during peak service.

Adopting a structured Soda Gun Setup is essential to avoid issues like leaks and off-tastes. Begin with branded fittings, as systems from Coca-Cola® often require specific nozzles. When using third-party syrups, a BIB Adapter may be needed to make the syrup package compatible with the existing connector.

Bag-In-Box Syrup Advantages And Flavor Choices

Bag-in-Box Syrup comes in five-gallon bags, fitting standard racks. This format lowers packaging costs and storage needs while providing a variety of flavors. Incorporating popular choices like cola and lemonade, along with specialty concentrates, can boost add-on sales.

Connecting Syrups: Nozzle Fit And Adapter Needs

Confirm Syrup Compatibility before buying syrups, connectors, or replacement parts. A mismatched Soda Gun Nozzle can create drips or poor flow. If syrup brands or connector styles differ, a BIB Adapter may be required. Use a dedicated rack and a full installation kit for stable pressure and organized tubing runs.

Ratio Calibration And Cross-Contamination Prevention

Set water-to-syrup ratios according to manufacturer guidelines, often 5:1 but varying by brand. Test by pouring sample servings and adjust until the taste meets expectations. Regular ratio checks help maintain consistent flavor during long shifts and busy service periods.

When possible, dedicate lines to single flavors to avoid cross-contamination. Flavor residues may remain inside tubing and affect future pours. If lines must be swapped, flush with water and draw a 24-oz serving to clear residues before service resumes.

Service Task Why it matters Recommended step
Verify nozzle fit Prevents leaks and poor pour Match Soda Gun Nozzle to brand or add BIB Adapter
Use correct rack and installation kit Supports steady pressure and organized tubing Install a full kit with hoses, clamps, and regulators
Set water-to-syrup ratio Determines flavor strength and drink quality Adjust to manufacturer’s ratio, taste test, re-check weekly
Prevent cross-contamination Preserves pure flavors and prevents off-tastes Use dedicated lines or flush thoroughly and draw a test pour
Routine servicing Maintains Syrup Compatibility and machine longevity Schedule technician inspections and replace worn fittings

Maintenance, Sanitation, And Parts For Bar Soda Guns

A clean, well-serviced bar soda gun helps deliver fast service and consistent drinks. This section outlines major components, daily cleaning, common faults, and practical fixes. It also shows where reliable Soda Gun Parts can be sourced for faster repairs.

Main bar soda gun components

The main components include the Bar Gun Nozzle, manifold, tubing, protective sheathing, Bar Gun Holster, and Cold Plate For Soda Gun. Nozzles commonly use twist-lock or o-ring designs. Tubing and connectors link the gun to BIB syrup lines, water, and CO2 supply. Insulated lines running from the cold plate to the manifold help keep drinks cold.

Routine cleaning and sanitation steps

Begin by washing your hands thoroughly. Remove the Bar Gun Nozzle and soak it with the connectors in an approved sanitizer such as Kay-5® or a chlorine solution. Clean the holster, sheathing, buttons, handle, and exterior surfaces. Let parts dry on a clean cloth before reassembly.

Empty and sanitize the ice bin, and always use dedicated ice scoops. Refill with cubed ice. Wait 15–20 minutes and briefly activate soda water after reassembly. Taste each drink to ensure quality. Avoid using the gun handle to break ice or store items in the ice bin.

Common soda gun troubleshooting issues

Warm or flat drinks often point to low ice, CO2 pressure issues, water-filter problems, or damaged tubing insulation. If no dispensing in 30 minutes, discard a 24-oz soda.

Off-tastes or odors may suggest missed cleaning, contaminated ice, expired filters, or liquid trapped in underground chases. Overly sweet or watered-down drinks may be linked to empty BIBs, incorrect regulator settings, or bad syrup ratios. Have a technician check the system if ratio problems continue.

Noisy carbonators may be dry or have low inlet water pressure. Check water supply and filter cartridges. Leaks or loose nozzles often come from improper reinstall or worn seals. Identify the nozzle type and soak stubborn seals in sanitizer to loosen them.

Sourcing soda gun parts and supplies

Major beverage manufacturers like Coca-Cola® offer replacement parts and tech support for branded systems. Independent suppliers often stock spares such as valve bodies, nozzle assemblies, thermometers, sanitary drip cups, regulators, and fittings.

Installation Parts Supply can be a helpful source for fittings, hoses, clamps, Cold Plate For Soda Gun units, and plumbing components. Keep a small inventory of critical Soda Gun Parts and labeled connectors to speed up repairs and reduce downtime.

Choosing The Right Soda System: Cost, Customization, And Installation

When selecting a soda setup, start with a clear budget and a list of priorities. The Commercial Bar Soda Gun System Cost depends on the unit style, number of valves, and whether it has an internal or external carbonator. Costs can also rise when advanced cooling options such as direct refrigeration or a cold plate are included. Complex drop-in installations can add more labor, fabrication, and installation expense.

Remember to include extra items that affect the total Soda Gun Machine Cost. CO2 tanks, regulators, piping, adapters for specific BIB connectors, and labor for cut-in installations all contribute. Budget also for ongoing expenses such as BIB syrup, sanitizer, spare nozzles, worn fittings, and preventive maintenance for the Bar Soda Gun System.

Customization can improve guest satisfaction and help increase beverage sales. Adding flavor shots or extra valves allows staff to create signature mixes and upsell premium drinks. Visual upgrades such as LED lighting, branded graphics, and recipe displays can attract attention and promote seasonal drinks.

Branded cups, straw dispensers, and dispenser wraps can create a unified beverage station appearance. Use graphics that match your hospitality brand to improve recognition and encourage repeat purchases.

Plan the installation with a clear kit in mind. A proper setup uses a slanted BIB holding rack, pressure regulators, clamps, suitable hoses and fittings, and cold plates for bar gun setups. Ensure compatibility by including adapters for common BIB connectors to prevent leaks.

Professional installation is recommended for drop-in units and systems using external carbonators. Countertop models and many Bar Gun Dispenser setups can be assembled by trained staff or an experienced technician. Leave room for CO2 tanks and make sure staff can easily access the system for routine checks and maintenance.

When sourcing parts, seek specialists who offer fittings, cold plates, hoses, clamps, and installation kits. Installation Parts Supply offers many of these items, saving time when matching components to a specific Soda Gun Dispenser or Bar Gun Dispenser configuration.

Keep manufacturer resources from brands such as Coca-Cola Solutions available for cleaning guides, troubleshooting charts, and service contacts. These resources can speed up startup and reduce downtime when taste, flow, or carbonation issues occur in a Soda Gun System.

Conclusion

Choosing the right Bar Soft Drink Dispenser is essential for speed of service and beverage margins. A properly selected Bar Soda Gun System paired with bag-in-box syrups can reduce beverage product cost. It can also reduce packaging waste and increase menu flexibility for cocktails, mixers, and nonalcoholic drinks.

Before making a purchase, review the dispensing valves, ice and cooling types, carbonator capacity, and BIB compatibility. Routine work such as ratio calibration, sanitation, cleaning, and maintenance helps maintain consistent flavor and carbonation. These steps are important for the long-term performance and life of a Soda Dispenser Gun.

Remember, there are ongoing costs like CO2, syrup, sanitizer, replacement nozzles, and parts. Rely on reputable suppliers and manufacturer support lines for parts and installation kits. With the right Bar Soda Dispenser and a solid maintenance plan, bars and restaurants can deliver faster service, a wider drink menu, and increased profitability from their beverage offerings.

Related: Comparing Different Soda Gun System Technologies

The Global Equivalents of Grounding Adapters

Using the proper electrical adapter while traveling is essential for reducing risks and making sure your devices work correctly. This guide is intended for U.S. travelers and focuses on choosing a grounding adaptor plug and grounded plug adapter for international use. It explains the importance of a grounding adapter and highlights safe, convenient plug adaptor and outlet adaptor models.

Visit website of Ground Adapter
Many modern chargers operate within a 100–240V range, making a plug adaptor sufficient for phones and laptops. Even so, equipment like motor-driven devices, hair tools, and some appliances may require both a voltage converter and a three-prong adapter. Knowing regional outlet types — including Type A/B, C, E/F, G, and I — is important when selecting the right grounding adapter before you leave.

For travel-ready models, you may want to look at the Ceptics GaN 70W Universal Travel Adapter, Tessan GaN 65W, and Epicka Pulse. If you want compact or budget-conscious choices, the Ceptics 6-in-1 and One Beat Travel Plug Adapter provide grounded or partially grounded ports at lower prices. If you need to run higher-power equipment, the Arsmel VisaPro and Ceptics travel power strip supply multiple grounded outlets.

Key Takeaways

  • Use a grounding adaptor plug whenever your devices or hotel outlets do not provide a dependable ground.
  • Most USB chargers support 100–240V, so you generally need only a plug adaptor rather than a voltage converter.
  • Match plug types (A/B, C, E/F, G, I) to your destination so everything fits correctly.
  • Select grounded plug adapter models like Ceptics, Tessan, or Epicka when you want safety and USB power.
  • High-power devices may require a voltage converter plus a three-prong adapter for safe operation.
  • For bulk purchases, distributors such as Installation Parts Supply can supply grounded outlet adaptors and travel power strips.

Understanding Grounding Adaptor Plug Safety And The Importance Of Grounding

Grounding plays a vital role in safety when you use unfamiliar outlets. It creates an earth path that can trigger a breaker or redirect fault current. That helps protect both users and sensitive electronics from harm. Many travelers do not realize how important grounding is until they experience a shock or equipment damage from a faulty device.

What grounding does: preventing shocks and equipment damage

Grounding limits the voltage on exposed metal parts. If insulation breaks down, the earth connection gives current a low-resistance path. This significantly reduces the risk of electric shock and protects various devices from fault currents.

Common Ground-Related Terms To Know

Before buying anything, get familiar with common grounding terms. A ground plug adapter helps three-prong cords fit into local sockets. You may see products labeled as grounded adapters or outlet ground adapters. Understanding this language makes it easier to choose an adapter with a real earth connection.

How Grounded Outlets Vary By Country And Outlet Type

Outlet designs vary widely around the world. In the United States, Type B outlets feature two flat blades and a round ground pin. Europe’s Type E and F outlets provide earth via a top contact or side clips. Type G is used in the U.K. and includes a rectangular earth pin. Australia and parts of Asia employ Type I, featuring an earth blade below two angled live and neutral prongs. Universal travel kits often include these common plug types, though they may not cover rare regional sockets.

When A Ground Is Required: Motors, Appliances, And Sensitive Electronics

Not all devices need grounding. Double-insulated USB chargers and phone adapters can operate safely without it. Still, equipment with motors, heating elements, power tools, desktop computers, and audio amplifiers generally requires a solid earth connection. When your device has a three-prong cord, it is best to bring a quality ground plug adapter or outlet ground adapter that keeps the earth connection intact.

Choosing The Right Ground Adapter For Travel: Types And Compatibility

Selecting the right travel adapter is essential if you want your devices to stay safe and functional. A compact grounded solution is especially useful for protecting laptops, chargers, and camera gear. This guide aims to help you find the perfect match for your travel needs, ensuring your grounded plug adapter works as intended.

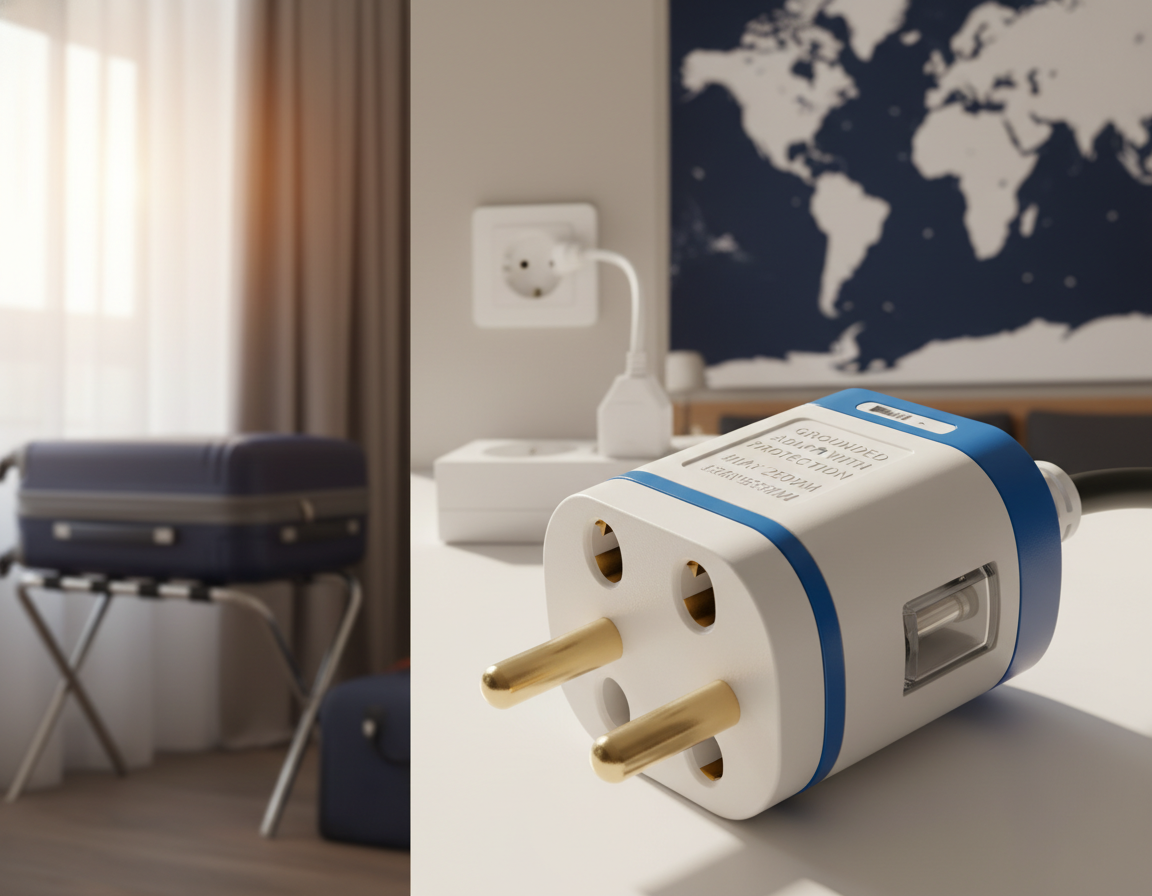
Grounding Plug Adapter

Universal Travel Adapters Vs Single-Country Plug Adaptors

Universal travel adapters, such as the Ceptics GaN 70W, Tessan 65W, and Epicka Pulse 45W, support various plug types including A, C, G, and I. Because they include USB ports as well, they are especially practical for multi-country travel. This can remove the need to bring multiple electrical plug adapters.

Universal adapters are convenient because they combine multiple prong sets with USB charging. Yet, they can be bulky and prone to mechanical failure. Their charging speed may also be slower compared to dedicated chargers.

By contrast, single-country plug adaptors are usually smaller and often more reliable when traveling within one region. Pairing them with a reliable multiport USB charger is often a space-saving choice. It’s important to check the outlet styles before purchasing a plug converter, as some countries use uncommon types like D, H, or M.

Grounding Plug Adapter Form Factors And Styles

A three-prong adapter provides an earth pin for equipment that requires genuine protective grounding. They are essential for appliances that include a grounding prong.

A grounded adapter keeps the ground path intact whenever the wall outlet supports grounding. That is critical if surge protection and safety circuits are expected to function correctly.

By comparison, a ground lift adapter disconnects or isolates the earth connection. It’s often used by audio technicians to eliminate ground-loop hum. Still, it should never be considered a safety measure because it disables the protective earth.

Matching Plug Types To Destinations Using Outlet Style Guide

It is important to match both the plug body and grounding style to local sockets. Type A/B is common in the US, Canada, and Japan. Type C is common throughout continental Europe and in parts of South America. India commonly uses Type D, whereas several European countries use Type E/F. Type G is standard in the UK and Ireland, and Type I is used in Australia, New Zealand, and parts of China.

When choosing an adapter, make sure it fits physically and satisfies your device’s grounding needs. A grounded plug adapter that fits but does not preserve the ground provides very little protection.

Plug Type Common Countries Grounding Recommended Adapter
Type A/B United States, Canada, Japan Type B includes a ground pin Three-prong adapter or grounded adapter matched to Type B
Type C Most of Europe, South America No dedicated earth on two-pin plugs Universal adapter with a secure fit or a regional plug converter
Type D India and Nepal Older three-pin format with earth Single-country plug adaptor or a universal model that supports Type D
Type E/F France, Germany, parts of Europe Earth via pin (E) or side contacts (F) Grounded adapter that preserves the pin or contact earth connection
Type G United Kingdom, Ireland, Hong Kong Large rectangular earth pin Grounding adapter or dedicated UK plug converter
Type I Australia, New Zealand, and parts of China Flat angled live and neutral blades with earth pin Universal adapter that supports Type I or a single-country adaptor

When You Might Need A Voltage Converter In Addition To A Plug Adaptor

A large share of modern electronics can operate within a 100–240V range. If a device is labeled “Input: 100–220V,” it usually needs only a plug converter for outlet compatibility.

Appliances with high wattage, heaters, or motors often need a voltage converter or a local equivalent. The Ceptics 2,000-watt travel voltage converter can handle heavy hair dryers, though it has limits and may not support electronics with electronic controls.

If you are unsure, it is usually better to leave heavy appliances at home or buy local versions. Use a grounded plug adapter for electronics that require earth, and add a proper plug converter only if the device does not list voltage compatibility.

Top Grounding Adapters And Travel-Friendly Electrical Adapters To Consider

Travelers seeking reliable power should opt for grounded options that align with their device needs and the outlets available at their destination. Grounded plugs enhance safety for laptops and other appliances. Below, we highlight compact, high-power, and wholesale options to assist in selecting the ideal grounding adapters for your journey.

Best overall travel adapters with grounded outlets and USB ports

The Ceptics GaN 70W Universal Travel Adapter stands out for its versatility across multiple countries. It supports Type A, C, G, and I plugs and includes high-power USB-C for charging laptops and phones. The Tessan GaN 65W is another strong option, balancing price and power well. For travelers who prefer a compact hybrid design with several USB ports, the Epicka Pulse 45W is a suitable option. All of these models support grounded adapters where local outlet designs permit.

Compact And Budget Grounded Options

For travelers who want to pack light and spend less, the Ceptics 6-in-1 Worldwide Travel Adapter is an economical pick. This model gives you basic grounded plug coverage without a high cost. The Anker European Travel Plug Adapter includes one grounded US outlet, USB ports, and overload protection for modest loads. For budget-minded travelers, the One Beat Travel Plug Adapter is a simple but effective way to access grounded sockets in different plug formats.

High-Power And Multi-Outlet Solutions For Grounded Use

If you need more wattage or several grounded sockets, the Arsmel VisaPro All-in-One 170W is a strong solution. Ceptics also makes travel power strips with multiple grounded US outlets and interchangeable heads for different regions. These are useful for powering multiple chargers, camera gear, or small appliances while keeping devices grounded.

Where To Buy Wholesale Grounding Adapters And Distributor Tips

If you need bulk quantities, Installation Parts Supply is a reliable place to source grounded plug adapters and related electrical adapter hardware. For single-unit purchases, manufacturer stores like Ceptics and recognized brands such as Anker usually provide clear specifications. Always check for certifications like CE, RoHS, and FCC and ensure the presence of built-in fuses or overload protection before making a purchase, whether wholesale or retail.

Model Typical Price (USD) Grounded Outlet USB Ports Best for
Ceptics GaN 70W $45 Yes, with interchangeable heads 2–3 (including USB-C) Multi-country power for laptops
Tessan GaN 65W $38 Yes 2–3 Balanced power and portability
Epicka Pulse 45W $30 Yes, where the outlet supports grounding 2–3 Compact hybrid charger
Ceptics 6-in-1 $19 Yes 0 to 1 Budget traveler with basic needs
Anker European Travel Plug Adapter $16 Single grounded US outlet 1–2 with limited total wattage Short European trips and phone charging
Arsmel VisaPro 170W $80 Yes Multiple (varies) High-power, multi-device setups
One Beat Travel Plug Adapter $15 Yes 0 to 1 Affordable outlet adaptor for simple use

How To Use Grounding Adapters Safely On The Road

Before your trip, make sure to test your grounding plug adapter kit. Plug in chargers, laptops, and higher-wattage devices at home first. This ensures they fit and work properly. Keep at least one adapter in your carry-on so you can charge devices right away when you arrive. Also place power banks in your carry-on, since many airlines cap battery capacity at around 27,000 mAh.

Always confirm that your adapter suits your device’s requirements. Review the wattage and port limits of your plug adaptor. They range from small USB chargers to travel hubs with 30–170W ratings. Use a three-prong adapter or grounded plug adapter whenever the outlet provides an earth connection. Never plug motors or heaters into adapters that cannot handle the required load.

Whenever you can, use grounded options. Grounded plug adapters or outlet ground adapters are safer for appliances and sensitive electronics. Only use ground-lift adapters if you fully understand audio ground-loop issues and are willing to accept the loss of protective earth.

Inspect your grounding plug adapter before each use. Look for any damage, such as cracked housings, loose prongs, or rattling inserts. Any damaged adapter should be replaced immediately. Instead of daisy-chaining multiple adapters, use travel power strips with built-in protection.

Check local outlets as soon as you arrive. Use an outlet style guide to identify types such as A/B, C, E/F, G, I, and less common formats. In older buildings or in places that use Type L or N, ask your host for a rated power strip or purchase a local adapter to preserve grounding.

For safety, choose certified products. Look for safety marks like CE, FCC, or RoHS, along with features such as fuses or overload protection. Brands such as Anker, Ceptics, and Epicka offer travel adapters that include these safeguards.

Have voltage labels ready. A plug adaptor should usually be sufficient if the device is rated 100–220V 50/60Hz. For any other rating, use the correct voltage converter so you do not damage the device. Today’s multiport GaN chargers support broad input ranges and help reduce heat during multi-device charging.

Follow a few simple daily habits for better safety. Unplug adapters when they are not in use, avoid wet or overcrowded outlets, and make sure outlet ground adapters fit firmly. These habits reduce risks and keep you powered safely while traveling.

Troubleshooting Grounding Adapter Issues And Hotel Outlet Quirks

Grounding adapter problems are often caused by stiff or worn parts. Inspect the adapter’s prongs and locking mechanisms before use. Some models, such as the Ceptics 65W World Travel Adapter, include both grounded and non-grounded outlets. Be sure you know which outlet is safe for your device.

Outlets can vary a lot, even within the same city. Europlugs may not fit securely in older European or Italian Type L sockets. Older hotel outlets may be loose or may lack the ground pin. If your adapter does not fit properly, ask the front desk for a power strip or another outlet.

If a socket appears ungrounded or miswired, do not plug in equipment that requires earth. Use double-insulated devices or a certified isolating adapter instead. For faults related specifically to grounding, check continuity with a small outlet tester or a multimeter.

When a grounded plug adapter shows no ground continuity, the outlet may be miswired or missing a proper earth. That outlet should not be trusted for surge-sensitive equipment. Ground lift adapters can remove hum in audio setups, but they also remove the protective earth. They should never be used with appliances that need a safety ground.

For high-wattage failures, keep in mind that voltage mismatch—220V vs. 120V—is often the actual problem. This calls for a proper voltage converter, not just an electrical adapter.

Pack a compact, well-rated universal adapter from trusted brands such as Ceptics, Tessan, or Epicka. Keep a few single-country plug adapters on hand. An outlet ground adapter or a basic outlet tester can help you check safety fast. For larger needs or installer-grade grounded adapters, contact distributors like Installation Parts Supply to source grounded plug adapter hardware and compatible grounding adapters in bulk.

Related: Durable and Reliable: Why Max Angle Stop Adapters are a Top Choice

How to Source Spare Parts for Beer Brewery Equipment

Selecting the right Beer Brewery Equipment is essential for production capacity, beer quality, and everyday efficiency. Whether you are moving from a basement setup to a pilot brewery or expanding a taproom, your equipment choices should match your goals. Be sure to consider your preferred beer styles, the space you have available, and your budget.

Continue reading about Home Beer Brewing Equipment For Sale
Startups and growing operations should focus on core systems first. Invest in reliable mash and lauter systems, a solid boil kettle with whirlpool capability, and properly sized fermenters and brite tanks. Add advanced automation at a later stage. This staged approach helps avoid costly mistakes and keeps your capital focused on actual needs.

Thousands of microbreweries now operate in the U.S. craft beer market, so commercial ventures need reliable gear and a solid business plan. Purchasing from reputable suppliers offering beer equipment for sale and keeping essential homebrew supplies for test batches helps maintain consistency as you scale.

Practical planning goes beyond tanks and kettles. Pumps, sanitary plumbing, cleaning systems, and dependable filtration are essential for consistent brewing. For those transitioning from hobby to small commercial work, compare microbrewery gear and home beer brewing equipment for sale. Choose equipment that aligns with your timeline and growth targets.

Understanding Brewery Goals And Site Requirements

Start by defining clear production goals and the beer styles you plan to brew. A five-barrel brewhouse works well for a neighborhood brewpub, while twenty-barrel systems are more suitable for regional distribution. Make sure fermenter capacity matches brewhouse output to prevent bottlenecks, especially with lagers that require extra conditioning time.

Make early decisions about your level of automation. For brewpubs, basic controls, VFDs, and temperature controllers can significantly cut labor costs. More automation usually benefits larger sites by improving consistency and efficiency.

Assessing Production Volume And Scalability

Estimate annual and peak demand so you can size the brewhouse and fermenters realistically. Include spare capacity for seasonal runs and pilot batches in your planning. If growth is likely, choose modular microbrewery gear or industrial brewing machinery that can be expanded in stages.

Match fermenter count to batch scheduling. Use unitanks or extra bright beer tanks to improve throughput. Plan for different beer styles by setting aside reserve tanks for beers that require long conditioning.

Space Constraints, Utilities, And Layout Planning

When planning your layout, think about workflow across grain handling, milling, the brewhouse, cellar, cold storage, and packaging. High ceilings allow for stacked tanks. Limited space may call for combination vessels or multifunction tanks that combine mash tuns and lauter tuns.

Size utilities during design: water supply, wastewater routing, steam or electric heat, compressed air, CO2 capture, and glycol cooling. Proper plumbing and routing prevent future rework; source valves, hoses, and fittings from reputable distributors to meet code and durability needs.

Budgeting and phased equipment investment

Break the budget into categories: brewhouse, fermentation and cellar, packaging, utilities, and logistics. Make essentials like brewing kettles, pumps, and core tanks the top priority.

Consider phased investments to protect cash flow. Begin with core beer brewery equipment and basic microbrewery gear. Add commercial brewing equipment and industrial brewing machinery, like automated packaging lines or extra BBTs, as revenue allows.

Brewery Bottling Equipment

Planning Area Key Considerations Typical Equipment
Brewhouse sizing Align batch size with the market and leave room for growth Brewing kettles, mash/lauter systems, malt mill
Fermentation And Cellaring Turnover rate, beer styles, conditioning capacity Fermenters, unitanks, bright beer tanks
Utilities And Site Layout Water, waste, steam or electric heat, glycol, and CO2 routing Pumps, heat exchangers, glycol chillers, valves
Packaging And Logistics Storage, throughput, distribution channels Kegging lines, canning machines, and storage racking
Budget Strategy Prioritize essentials; phase noncritical purchases Core beer brewery equipment first, then commercial brewing equipment

Beer Brewery Equipment: Core Milling And Brewhouse Systems

The right brewhouse parts are crucial for both production efficiency and beer quality. This section examines how milling, mashing, lautering, and boiling systems work together. It’s essential to select equipment that aligns with your batch size, recipe variety, and future growth.

Malt Milling Options

Mash efficiency and lautering can be strongly affected by milling. Smaller breweries may choose pre-milled grain for convenience. Yet, on-site milling offers better control over grain processing. With a commercial malt miller, you can buy grain in bulk and adjust crush settings for each recipe.

Two-roll and four-roll dry mills are among the most common options. Look for features like stainless steel construction, adjustable rollers, and automated feeding for consistent throughput. Light wetting or conditioned milling can reduce dust and preserve husk integrity without the added complexity of full wet mills.

Mash Tuns, Lauter Tuns, And Combined Systems

For brewpubs and smaller production sites, combined mash/lauter vessels are ideal because they save space and reduce cost. Separate mash and lauter tuns, on the other hand, enhance throughput and facilitate parallel brewing during peak times.

Select vessel size based on how often you brew and how large your batches are. Maintain mash temperatures between 148°F and 158°F for optimal conversion, requiring about 60 minutes for saccharification. To prevent stuck mashes, lauter tuns need to deliver even runoff and good grain-bed management.

Boil Kettles And Whirlpool Vessels

Boil kettles are available in steam-heated, electric, and direct-fire models. Steam systems are best for larger operations needing precise temperature control. Electric kettles are suitable for pilot systems, while direct-fire kettles offer a cost-effective option.

Kettles should be sized with at least 40% additional volume to help prevent boil-overs. A dedicated whirlpool tank can improve wort clarity, reduce kettle occupancy time, and increase the number of daily batches. The number and size of vessels should match both projected growth and recipe complexity.

Cellar And Fermentation Equipment

Fermenting tanks are fundamental to any craft brewery. Cylindroconical fermenters simplify yeast removal, speed up clarification, and make cleaning easier. Integrated glycol jackets for accurate temperature control and ports for sampling and dry-hopping should be included.

Choosing the right tank size is critical. It should align with your brewing schedule and volume. If you produce lagers or barrel-age beer, additional capacity is needed to prevent bottlenecks. A combination of small and large tanks is ideal for switching between small-batch saisons and high-volume IPAs.

Brite tanks are used to prepare beer for packaging. Pressure-rated brite tanks make accurate carbonation and conditioning possible before bottling, canning, or kegging. This setup frees up fermenters for new batches, speeding up the packaging process.

In one vessel, unitanks handle both fermentation and conditioning. They reduce transfers and lower oxygen exposure, which enhances flavor stability. When cellar space is limited, unitanks can reduce the need for multiple vessels, even though the upfront cost is higher.

Horizontal lagering tanks are perfect for conditioning bottom-fermented beers. They offer gentler conditioning due to lower hydrostatic pressure and stable temperature distribution. This improves yeast health and clarity during long lagering periods.

Serving tanks are often used in brewpubs that dispense beer directly from cold rooms. Single-walled serving tanks eliminate the need for kegs, simplifying draft flow and keeping beer cold and fresh.

Yeast management systems are another important consideration. House strains can be preserved more effectively with dedicated yeast brinks and propagation tanks, reducing reliance on suppliers. Good yeast handling is essential for consistency across batches.

When planning your cellar layout, include space for beer filtration systems. Your filtration choices affect flavor, shelf life, and clarity. Make sure ports, pump access, and piping support smooth transfers among fermenting tanks, brite tanks, unitanks, and filtration stages.

Supporting Equipment: Plumbing, Pumps, Filtration, And Cooling

Reliable support gear is essential for a brewery’s daily operations. Pumps move wort, beer, and cleaning solutions accurately throughout the brewery. Plumbing components connect tanks, control flow, and help prevent contamination. Filtration and cooling systems are critical for preserving clarity and maintaining stable temperatures in every batch.

Brewery Pumps And Flow Management

Pump selection should take into account flow rate, maximum head, vertical suction lift, and power requirements. High-flow transfers are well suited to centrifugal pumps. Peristaltic and diaphragm pumps, by contrast, are better for protecting sensitive yeast and managing CIP fluids. Integrating Variable Frequency Drives can help reduce energy consumption and extend motor lifespan.

Valves, Hoses, Fittings, And Plumbing

Small components can still make a major difference. Use stainless steel valves, sanitary tri-clamp fittings, and reinforced gas hoses for CO2. Food-grade tubing is also essential. For reliable sourcing, collaborate with a plumbing wholesale distributor like Installation Parts Supply. They can supply brewery-grade parts and traceable materials that comply with health codes.

Quality Control And Filtration Systems

Filtration is key to removing yeast and particulates, ensuring clarity and shelf life. Breweries can choose from plate-and-frame, DE, membrane cartridge, and crossflow filtration systems. Choose the right filter based on the beer style and distribution plans. To monitor fermentation and packaging quality, incorporate hydrometers, refractometers, and dissolved oxygen meters into the workflow.

Glycol Chillers And Cooling Systems

Managing temperature is essential for preventing spoilage and shaping flavor. A small setup may use a python chiller. Larger breweries, on the other hand, rely on glycol chillers tied into jacketed fermenters for precise temperature control. Ensure the chiller’s size matches the facility’s load and design cooling systems with redundancy to avoid costly temperature swings during fermentation.

Kegging Systems, Packaging, And Distribution Equipment

This section delves into the equipment needed to move beer from the cellar to the market. It’s vital to select systems that align with production goals and distribution strategies. Compact solutions work for small taprooms, while regional distribution demands robust, high-throughput equipment.

Kegging is still essential for taproom service and draft sales. If budgets are limited, manual keg fillers are cost-effective. Semi-automated and automated systems reduce labor and speed up filling for growing breweries. A quality keg cleaning and wash system is essential to protect beer flavor and avoid rework.

Kegging Methods And Fill Options

Couplers and dispensing heads should meet North American draft standards. Consider using counter-pressure filling for bottles or cans. Draft lines, regulators, and gas panels are all necessary for distribution and on-site sales.

Canning And Bottling Choices

Low-volume runs and house brands are well served by tabletop and direct-draw canning systems. For wider distribution, counterpressure canners help lower oxygen pickup and improve shelf life. Without heavy capital expense, mobile canning crews offer flexibility, but they do require cold storage and careful scheduling.

Bottling is often the preferred format for specialty and premium beers. Manual bottling is suitable for limited runs. Automated bottling lines with pressure fillers, rinsers, and labelers are necessary as volume increases. Choose the filler type based on bottle design to minimize oxygen and maintain carbonation.

Support Equipment And Storage For Packaging

Workflow can be improved with packaging equipment such as conveyors, labelers, and pack-off stations. Cans, bottles, crowns, and labels stay organized with proper shelving and racking. Plan for cold storage to match distribution rhythms and seasonal spikes.

Function Small Breweries Growing Breweries
Keg Filling manual fillers and compact keg washers semi-auto lines, automated keg washers
Can Packaging tabletop or direct-draw systems counterpressure canners and mobile canning coordination
Bottling manual bottling and hand labelers pressure fillers, automated rinsers, labelers
Packaging Support basic conveyors, shelving integrated packaging equipment, cold storage

As you purchase, compare beer equipment vendors across packaging, kegging, and filling lines. Think about service plans, spare parts availability, and training. Work with specialized craft-beverage carriers for large equipment moves or mobile canning dates to protect schedules and equipment.

Plan your system sizes with growth in mind. When packaging and distribution equipment are properly matched, breweries can maintain shelf life and reduce expensive downtime. This allows breweries to scale reliably while protecting product quality and brand reputation.

Conclusion And Next Steps

Embarking on a brewery build requires aligning equipment with production goals, beer styles, and site constraints. A robust brewhouse, dependable fermenters, and basic packaging are essential. They help ensure beer quality all the way from mash to can or keg. Informed early decisions can prevent costly upgrades down the road.

Core commercial brewing equipment includes malt mills, mash and lauter systems, and kettles. Cylindroconical fermenters or unitanks, along with brite tanks, are also necessary. Safe and consistent operations also depend on support systems like pumps, glycol cooling, sanitation gear, and beer filtration systems. Even if you begin with homebrew supplies, choose brewery-grade components for better control and longer service life.

A staged purchasing plan is best. Start with a working brewhouse and cellar, then add brite tanks and automated packaging as revenue grows. When funds are tight, consider mobile canning. Source plumbing and fittings from trusted distributors. Include basic quality-control tools like refractometers, hydrometers, and DO meters. With this approach, breweries can move more smoothly from a garage setup to a sustainable microbrewery while adding the right gear at each stage.

Related: Stair Lifts: Essential Equipment for Improving Home Accessibility

The Training Programs from Oetiker Group

Could a single hand tool change how plumbers, HVAC techs, and automotive teams secure mission-critical connections? Oetiker Pincers are indispensable hand tools for crimping, closing, and securing Oetiker ear clamps, hose clamps, quick connectors, and other precision fittings. They are used across a wide range of settings, from residential plumbing repairs to HVAC installations and automotive work. The right oetiker pincer tool ensures consistent and dependable results that both professionals and manufacturers count on.

This webpage is about Oetiker Group
This article explores the functionality of the oetiker tool, its key features, and the variety of tools available, from manual pincers to crimping pliers. The article reviews common applications, how to choose the right tool, and where to purchase in the United States. Distributors like Installation Parts Supply are highlighted for their support.

Plumbers, HVAC contractors, automotive technicians, maintenance teams, and procurement specialists will find useful insights here. The article emphasizes the importance of oetiker clamp pincers for high-stakes applications. It discusses their superior closing performance, compound-action designs, and long-lasting reliability, and develops these themes in the following sections.

Main Takeaways

  • Oetiker Pincers ensure dependable, mission-critical closures for ear and hose clamps.
  • They are used in plumbing, HVAC, automotive, and industrial assembly.
  • Tool choices range from hand installation pincers to powered crimping pliers.
  • Installation Parts Supply and other U.S. distributors help support procurement and replacement parts.
  • Expect superior closing performance, compound-action design, and long-term reliability.

Overview Of Oetiker Pincers And Oetiker Clamp Tools

Oetiker tools are designed to efficiently close ear clamps and secure quick connectors in complex assemblies. They range from basic hand pincers to advanced, powered units that control the closing force and jaw profile. This section explains their functionality, comparison with common crimpers, and the significance of Oetiker’s history for both installers and manufacturers.

What Are Oetiker Pincers And How They Work

Oetiker pincers are tools, either manual or powered, created to deform the ear of an Oetiker clamp, forming a permanent seal. They apply a precise, localized force to reshape the clamp ear into a tight, leak-resistant joint. Many models incorporate a compound-action linkage, amplifying jaw force while minimizing the effort needed by the operator.

Oetiker Clamp Tools Vs. Other Crimping And Clamping Tools

Unlike generic crimpers and hose pliers, an Oetiker clamp tool is custom-made for the clamp’s specific profile and required closing force. This tailored fit reduces variability in closure geometry and minimizes rework on production lines. The specialized design of Oetiker pincer tools enhances consistency and meets stringent industry standards for sealing and mechanical integrity.

Oetiker’s Legacy: Quality And Global Reach In Assembly Solutions

Oetiker has been a leader in fastening technology for over eight decades, with a global presence and multiple manufacturing sites. Their commitment to R&D and controlled production supports the high-volume use of Oetiker crimping pliers and clamps in industries like automotive, HVAC, and medical. The company offers solutions like the PureLine® range, addressing cleanliness and sustainability needs while maintaining a wide service network for installers.

Oetiker Clamp Removal Tool

Key Features And Advantages Of Oetiker Clamp Pincers

Oetiker clamp pincers ensure consistent results in assembly and field service tasks. Their design converts minimal hand effort into powerful, consistent closures. This leads to less fatigue during prolonged use, with peak force applied at the final stage to secure the clamp.

Compound-Action Design And Superior Closing Performance

The compound-action linkage in Oetiker designs amplifies operator force throughout the stroke. This results in maximum effort applied at the last millimeter of closure. It ensures uniform crimp geometry on ear clamps and hose fittings.

Using an oetiker clamp tool can significantly reduce cycle times and rework. It works effectively with various clamp sizes, minimizing user strain.

Precision, Durability, And Long-Lasting Reliability

Oetiker tools feature hardened jaws and precision-machined profiles to control clamp deformation. This predictability reduces the risk of leaks over time.

In both production and service environments, an oetiker pincer tool withstands repeated use. It leads to reduced downtime and lower replacement rates, keeping projects on track.

Suitable For Ear Clamps, Hose Clamps, And Critical Connections

The choice of tool is critical in plumbing, HVAC, automotive, and EV cooling systems. Oetiker clamp pincers are designed for ear clamps and compatible hose clamps. They ensure leak-free joints where reliability is essential.

For installers needing handheld speed and reliability, oetiker hose clamp pliers offer the control and correct closing force. They meet demanding specifications without compromising consistency.

Types Of Oetiker Tools: From Pincers To Crimping Pliers

Oetiker provides a variety of tools to meet different clamp styles and closing-force needs. The selection ranges from manual hand pincers to the HIP power ranges for more demanding tasks. This section outlines the common types, their uses, and key specifications. This guide helps technicians choose the right tool for hose, quick connector, and clip work.

Hand Installation Pincers And HIP Series Power Ranges

Hand installation pincers employ a compound-action design to amplify user force, ensuring consistent crimps. The HIP series offers a range from low to very-high-force models. This allows users to match closing force to clamp requirements. The choice depends on the clamp type and the needed closing force for precise, repeatable results.

Oetiker Crimping Pliers, Clip Pliers, And Ear Clamp Tools By Application

Oetiker crimping pliers are perfect for swaging quick connectors and non-ear crimps, where precise deformation is essential. Oetiker clip pliers are designed to engage or remove retaining clips with minimal damage to parts. The oetiker ear clamp tool forms the ear on Oetiker clamps, creating leak-resistant hose joints. Selecting the correct tool ensures the right force and clamp profile for hose installation or connector assembly.

Specialized Tools Including High-Force Models (HIP 7000

The HIP 7000 | 425 is a high-force compound-action pincer for demanding closures. It has a reference jaw force of 7000 N, with a maximum near 8000 N. The jaw width is 12.5 mm, max jaw gap 16.0 mm, min 2.0 mm, length 310 mm, and weight 1045 g. Tools with more than 2000 N are used for heavy closing force needs.

For ear clamps requiring less than 2000 N, Oetiker suggests the HIP 2000 series compound-action tools. These lower-force alternatives reduce user fatigue while maintaining clamp integrity. Always be cautious of pinch points and keep fingers away from handles to avoid injury.

Contractors and installers often carry a small set of tools. This includes an oetiker pincer tool for ear clamps, an oetiker crimping pliers model for quick connector work, and dedicated oetiker clip pliers for retainer tasks. This kit approach minimizes tool swaps and accelerates installations on-site.

Oetiker Hose Clamp Pliers In Plumbing And HVAC

Oetiker tools are essential for plumbers and HVAC technicians who require reliable hose connections. This guide highlights the benefits of oetiker hose clamp pliers, the importance of PureLine® products in clean environments, and essential safety measures for daily use.

Plumbing Applications And Hose Clamp Installation Tips

Oetiker ear clamps are ideal for various applications, including potable and non-potable water lines, flexible hoses, and HVAC condensate drains. It’s important to use an oetiker clamp tool that matches the clamp and hose size. Ensure the clamp diameter and tool jaw width are compatible.

Align the ear clamp perpendicular to the hose axis for even deformation. Apply steady pressure until the ear is fully seated. Visually inspect the seat and test the assembly under pressure to confirm a leak-free joint.

Why Oetiker PureLine® Solutions Matter Where Cleanliness Is Critical

PureLine® clamps and oetiker clamp pincers are designed for clean environments, such as food and beverage lines, medical device tubing, and sanitary plumbing. Their materials and finishes are designed to minimize particulate shedding and facilitate easy cleaning.

Using a dedicated oetiker ear clamp tool with PureLine® parts reduces contamination risk during installation. This combination supports strict cleanliness standards and minimizes the risk of system downtime due to contamination concerns.

Safety And Best Practices For Installers

Ensure the tool force matches the clamp type. For heavy-duty or thicker ears, use the appropriate HIP series or a high-force model. Always follow the manufacturer’s instructions for tool maintenance and calibration.

Wear eye protection and avoid placing fingers near pinch points on the handles. Verify each clamp closure visually and, where necessary, pressure-test the assembly. Regular checks and proper personal protective equipment (PPE) are key to safe and reliable installations.

Automotive And Industrial Applications For Oetiker Pincer Tool

Oetiker clamp pincers and related tools are essential in thermal management systems, engine assemblies, and electric vehicle cooling circuits. These compact clamps ensure consistent sealing through repeated thermal cycles. Technicians depend on the consistent compression of ear clamps for tasks involving radiators, transmission coolers, and EV battery coolant lines.

Engine, EV, and thermal management applications

Cooling circuits require reliable seals under high temperatures and vibration. The oetiker clamp tool secures hoses on intercoolers, heater cores, and inverter cooling loops. Using a proper oetiker pincer tool minimizes leaks and service rework in both internal combustion engine and EV assembly lines.

Why automotive manufacturers trust Oetiker for reliable connections

OEMs and tier suppliers prefer Oetiker due to its support for high-volume production and strict specs. With over two billion components in the market, Oetiker enjoys broad acceptance. Global engineering support and factory testing ensure durability and traceability, maintaining steady assembly throughput.

Meeting demanding specs with precision clamps and connectors

For projects requiring tight tolerances, oetiker crimping pliers and oetiker clamp pincers offer controlled closure and measurable results. Oetiker’s R&D capabilities and multiple production sites allow for adapting clamp geometry and material to meet mechanical and environmental standards. This scalability aids in meeting cycle-time targets and quality audits.

Application Typical Tool Key Benefit
Heater and radiator hoses Oetiker pincer tool Uniform closure for leak-free sealing
Oil cooler and transmission lines Oetiker clamp tool High retention under heat and pressure
Inverter and EV battery cooling oetiker crimping pliers Corrosion-resistant clamps for long service life
Hose routing and fixed connectors Oetiker clamp pincers Repeatable, fast installations in production settings

How To Select The Right Oetiker Clamp Tool

Choosing the right tool can save you time and prevent unnecessary rework. It’s essential to match the tool specifications to the clamp’s geometry, material thickness, and required closing force. A simple checklist can help confirm the jaw width, maximum jaw gap, and reference closing force before making a purchase.

How to choose based on jaw width, maximum jaw gap, and closing force

When selecting a tool, compare the clamp profile to the tool’s jaw width. Narrow jaws are suitable for small ear clamps, while wider jaws are better for hose clamps and larger fittings. Ensure the tool’s maximum jaw gap is sufficient for the unclamped assembly.

Verify that the tool’s reference jaw force meets or exceeds the clamp’s closing-force requirement. For instance, the HIP 7000 | 425 has a 12.5 mm jaw width, 16.0 mm max jaw gap, and a recommended closing force near 7000 N. This data helps estimate compatibility with heavy-duty clamps.

When to choose high-force tools instead of standard models

For clamps requiring more than 2000 N to secure a joint, opt for high closing-force tools. The HIP 7000 series is ideal for demanding crimping tasks in industrial and automotive settings.

On the other hand, for ear clamps with closing forces below 2000 N, consider the HIP 2000 series or standard hand pincers. These tools reduce operator fatigue while delivering reliable results on common assemblies.

Matching the clamp type to the application: ear clamps, hose clamps, quick connectors

Use an oetiker ear clamp tool for single-use ear-style clamps that require a one-time permanent closure. For quick connectors or swaged joints needing repeatable, controlled crimps, choose oetiker crimping pliers.

For retaining clips and spring-style fittings, prefer clip pliers or a dedicated oetiker pincer tool that fits the clip profile. Consider the environment, reusability, and inspection needs when specifying clamps and tools.

Application Recommended Tool Key Specs to Check Why it Fits
Single-use ear-style clamps oetiker ear clamp tool Jaw width, closing force, verification mark Provides a controlled permanent closure and visible confirmation of a proper crimp
Hose assemblies (plumbing, HVAC) oetiker pincer tool Max jaw gap, jaw profile, corrosion-resistant finish Handles larger diameters and repeated field use with consistent crimps
Quick connectors and swaged joints Oetiker crimping pliers Stroke length, reference jaw force, die compatibility Delivers precise, repeatable crimps for electrical and fluid connectors
Heavy-duty industrial clamps High-force HIP series Jaw width, closing force (N), ergonomic design Handles high-force requirements with less operator effort and consistent results

Before making a purchase, request manufacturer data sheets and, when possible, test samples with your clamp and material. This step confirms fit and closing-force alignment for a trouble-free installation.

Buying Oetiker Pincers And Support For Contractors

Contractors and purchasing teams in the United States can find Oetiker tools through established distributors and wholesale suppliers. Sourcing from a trusted vendor like Installation Parts Supply offers bulk pricing, steady inventory, and professional order support for oetiker pincers and related installation gear.

Buying from a wholesaler ensures predictable project costs and reliable delivery. Inquire about volume discounts for oetiker hose clamp pliers, oetiker clip pliers, or oetiker crimping pliers for recurring jobs. A clear procurement path minimizes downtime on site.

Warranty terms and spare-part access are critical for long-term tool value. Confirm manufacturer and distributor warranties before purchase. Ensure spare jaws and replacement parts are stocked, vital for high-force models in heavy-duty assembly.

After-sales service should include repair options and clear return policies. Reputable distributors handle warranty claims, parts orders, and technical queries. This support keeps crews productive and tools in service longer.

Manufacturers provide technical resources to help select the right tool for the job. Use product datasheets, R&D notes, and virtual showrooms to compare closing forces, jaw widths, and clamp compatibility. These resources help match oetiker hose clamp pliers or oetiker crimping pliers to specific thermal management or PureLine® cleanliness needs.

Virtual demos and eMobility showrooms let teams visualize applications and confirm fit before buying. When paired with distributor expertise, these tools shorten the selection process and lower the risk of ordering the wrong oetiker clip pliers or related tooling.

Closing Summary

Oetiker Pincers stand out as a top choice for professionals seeking precision and reliability. They offer a range from hand installation pincers to the HIP series, catering to various force needs. This ensures consistent, tight crimps for hoses, ears, and specialty clamps. Using these tools guarantees dependable connections in plumbing, HVAC, automotive, and industrial sectors.

When selecting tools, it’s essential to consider jaw width, maximum jaw gap, and closing force. For demanding tasks, the HIP 7000 or HIP 425 equivalents are ideal. For everyday ear clamps, the HIP 2000 series strikes a perfect balance. Always prioritize safety by avoiding pinch points and using the correct hand positioning.

In the United States, finding Oetiker tools and clamps through trusted distributors like Installation Parts Supply is advisable. Consulting Oetiker’s technical resources, such as the eMobility 360° Virtual Showroom, is also beneficial. For projects requiring cleanliness, opt for PureLine® products to ensure compliance and longevity.

Related: Why Installation Parts Supply Is the Most Reliable Supplier of Oetiker Clamps